
Remember that time your trusty old BBQ grill decided to spontaneously disassemble itself right before the big summer cookout? Yeah, a critical leg snapped clean off. Panic, right? My first thought was duct tape (don't judge!). But then, a wild thought appeared: "What if I fixed it? Properly?" That's when I dragged out the dusty oxy-acetylene rig from the back of the shed. And let me tell you, when those two pieces of metal became one again, I felt like a literal wizard. The power! The satisfaction! And honestly, a little bit like I’d just cheated death with fire. If that sounds like a feeling you want to chase, then buckle up, because we’re diving into the wonderfully fiery world of oxy-acetylene welding.
Hey there, fellow makers and fixers! While modern welders get all the flashy attention, there's something utterly charming and incredibly versatile about the old-school oxy-acetylene torch. It’s not just for cutting metal like butter (though it does that beautifully too!). It’s also fantastic for fusion welding, brazing, and heating. Plus, you don’t need electricity, which is pretty neat when your project is out in the middle of nowhere. Or, you know, when the power goes out mid-weld (ask me how I know!).
Safety First, Always! (Seriously, Don't Be a Hero)
Okay, look, I know "safety talk" sounds like the grown-up version of "eat your vegetables," but seriously, with fire and pressurized gas, it's not a suggestion, it's a commandment. Or at least a very strong suggestion from your friendly neighborhood blog-writer who totally hasn't singed off a few arm hairs in their time. (Okay, maybe just one time. Don't tell my mom.)
- Eye Protection: Get some proper welding goggles with a shade rating of at least 5. UV rays from the flame are no joke for your peepers.
- Gloves: Leather welding gloves. You're playing with fire, literally.
- Ventilation: Work in a well-ventilated area. Those fumes aren't a new cologne you want to try out.
- Non-Flammable Surroundings: Clear your workspace of anything that could catch fire. Sawdust, old rags, your ex's love letters – all gotta go.
- Fire Extinguisher: Have one handy. Just in case.
Seriously, safety isn't boring when it saves your eyebrows. Or worse.
Your Gear: The Fiery Orchestra
You'll need a few key players for this metal-melting symphony:

- Oxygen and Acetylene Tanks: The big guys. Make sure they're secured and upright.
- Regulators: One for each tank. These bring the high tank pressure down to a usable working pressure.
- Hoses: Usually green for oxygen, red for acetylene. Don't mix 'em up!
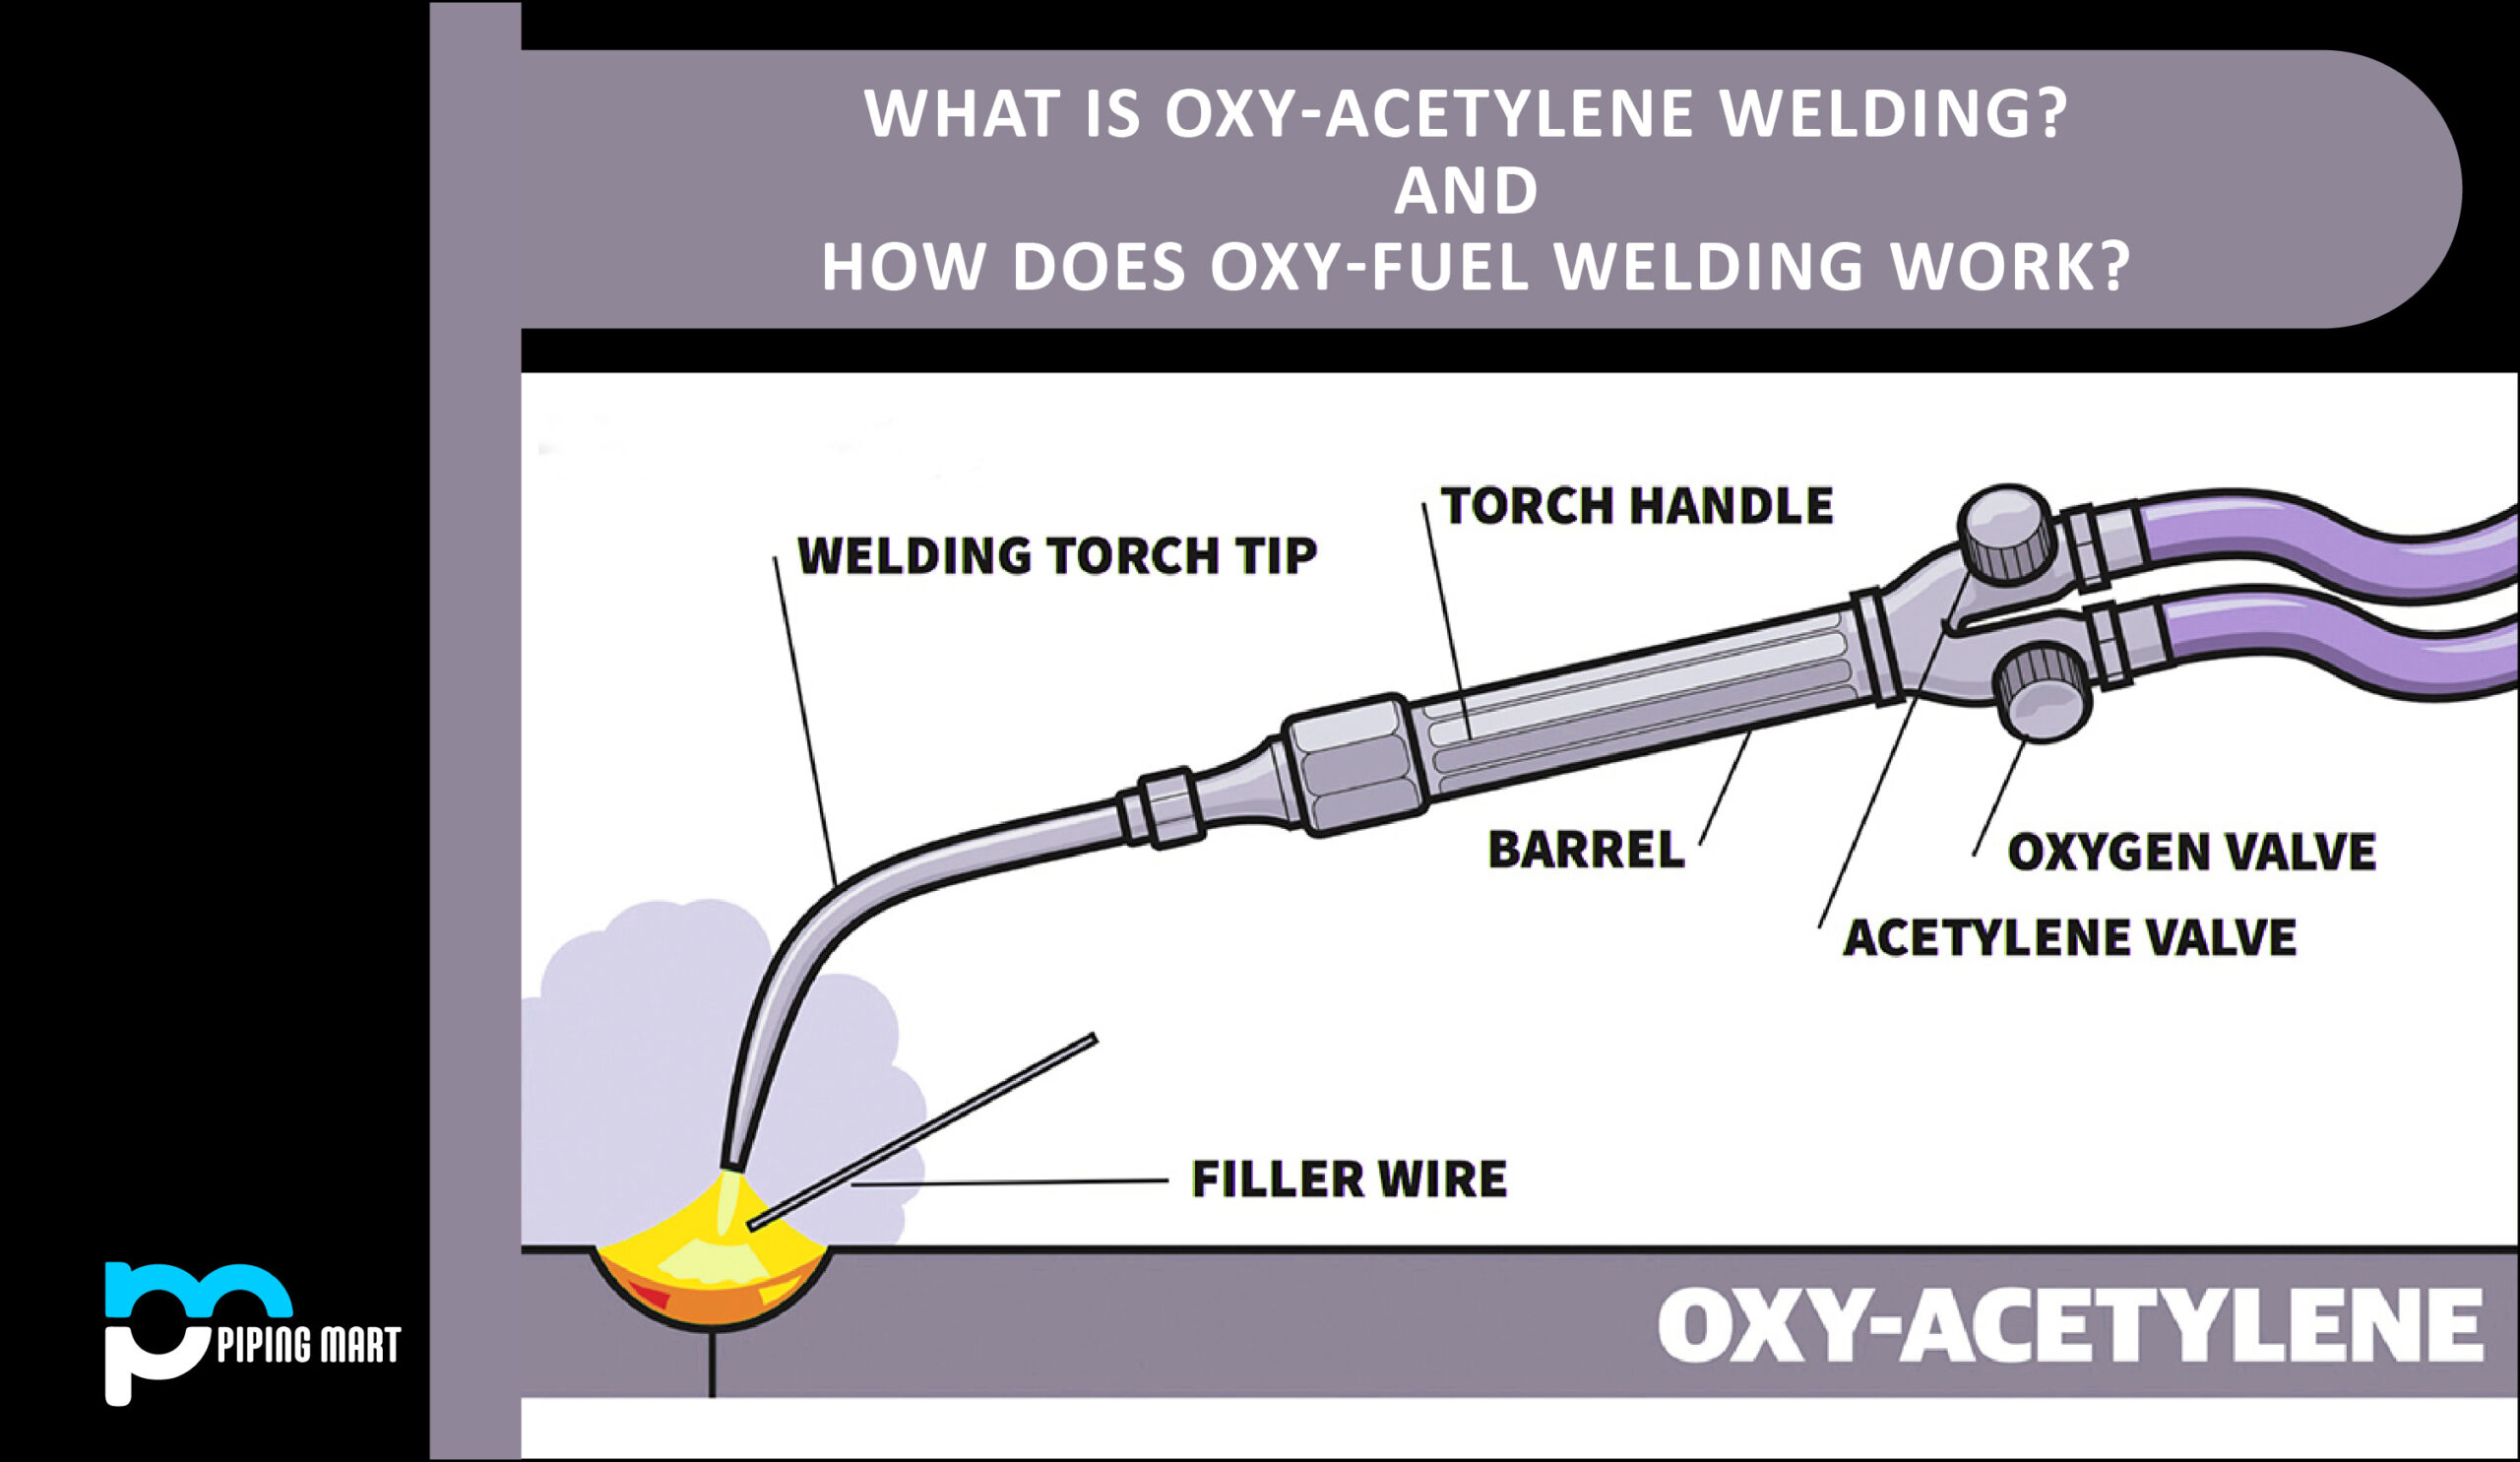
- Torch Handle and Tips: The business end. Different tips are for different metal thicknesses.
- Spark Lighter: Because a BIC lighter is not what you want near pure oxygen.
- Filler Rod: This is the metal you'll add to your weld joint. It usually matches the base metal you're welding (e.g., mild steel rod for mild steel).
Setting Up and Lighting the Dragon (Carefully!)
Alright, let’s get this party started. But gently, okay?
First, slowly open your oxygen tank valve (all the way) and your acetylene tank valve (only about a quarter to half a turn – this makes it easier to shut off quickly in an emergency). Set your regulators: for welding, generally 5-8 PSI for acetylene and 10-15 PSI for oxygen, but check your torch manufacturer's recommendations. Open the torch valves, purge the lines for a second or two, then close them.
Now, the exciting bit: lighting up. Open the acetylene valve on your torch handle about a quarter turn. Grab your spark lighter and light the gas. You'll get a big, sooty, yellow flame. Don't panic, that's normal. Slowly open the oxygen valve on the torch until the flame cleans up into a crisp, blue inner cone. You're aiming for a neutral flame – this means the inner cone is sharp and well-defined, not feathery (too much acetylene, called a "carburizing" flame) and not pointed or too short (too much oxygen, called an "oxidizing" flame). A neutral flame is your sweet spot for most welding.

The Dance of the Puddle: Actual Welding!
Okay, you’ve got a beautiful, roaring flame. Now what? Practice, practice, practice! Grab some scrap metal (mild steel is great to start with) and let's make some magic.
Hold the torch at about a 45-degree angle to your workpiece. Heat the metal until it starts to puddle. This is the moment where the metal literally melts and forms a shiny, molten pool. It’s mesmerizing, really. Once you have a puddle, gently introduce your filler rod into the very front edge of that puddle. The heat from the puddle should melt the rod, adding material to your weld. Withdraw the rod, move the torch forward slightly, and repeat the process, advancing the puddle and adding more filler metal as you go.
You’re essentially creating a continuous chain of melted metal, fusing the two pieces together. It's a delicate dance of heat and timing. Push the puddle, feed the rod, push the puddle, feed the rod. Keep that flame focused on the leading edge of the puddle, guiding it forward.
Tips for Your First "Masterpieces"
- Clean Metal: Always start with clean, rust-free, paint-free metal. Dirt and contaminants lead to weak, ugly welds.
- Consistent Movement: Try to keep your torch moving at a steady pace. Too slow, and you'll burn through. Too fast, and you won't get good penetration.
- Watch the Puddle: The puddle is your guide. It tells you if you're too hot, too cold, or just right. A good puddle is shiny and flows nicely.
- Angle Matters: Experiment with your torch and rod angles. Slightly pushing the puddle usually works well.
Don't get discouraged if your first attempts look more like bird droppings than professional welds. Everyone starts there! The key is to understand what the metal is doing, how it reacts to the heat, and how the filler rod integrates. It takes practice to develop that muscle memory and eye for the molten puddle. But trust me, when you finally lay down that smooth, consistent bead, you’ll feel like you’ve conquered a fiery dragon. And fixed your BBQ grill. Or whatever awesome project you've got going on.
So grab your gear, remember your safety, and get ready to create some sparks. Happy welding!
