Ever watched a blacksmith or a metal artist at work and been mesmerized by the way they transform rigid metal into something beautiful or functional? There's often a fiery secret weapon behind that magic: the oxy-acetylene torch! Far from being just a tool for pros in industrial settings, this incredible device brings a powerful, almost artistic capability into the hands of hobbyists, DIY enthusiasts, and anyone looking to tackle serious metalwork. It’s not just about brute force; it's about precision, creativity, and mastering fire to bend, cut, and join metal like a wizard.
So, what exactly does this fiery marvel do? An oxy-acetylene torch uses a controlled mixture of oxygen and acetylene gases to create an incredibly hot flame – often reaching temperatures over 5,600°F (3,100°C)! This intense heat is perfect for a variety of tasks. You can use it for cutting steel, slicing through thick plates as if they were butter. It's also fantastic for welding, fusing two pieces of metal together into a single, strong unit. Beyond that, it excels at heating metal for bending and shaping, brazing (joining dissimilar metals), and even removing stubborn nuts and bolts. The benefits are clear: versatility, strength in repairs, and the ability to bring ambitious metal projects to life in your own workshop.
Ready to light up? Hold your horses! Before you even think about striking a spark, remember that safety is paramount. Always wear proper personal protective equipment (PPE), including welding goggles or a face shield (shade 5 recommended for cutting), leather gloves, and flame-resistant clothing. Ensure you have good ventilation and a clear, non-flammable workspace. These torches involve high-pressure gases and extreme heat, so respect the power and never cut corners on safety precautions.
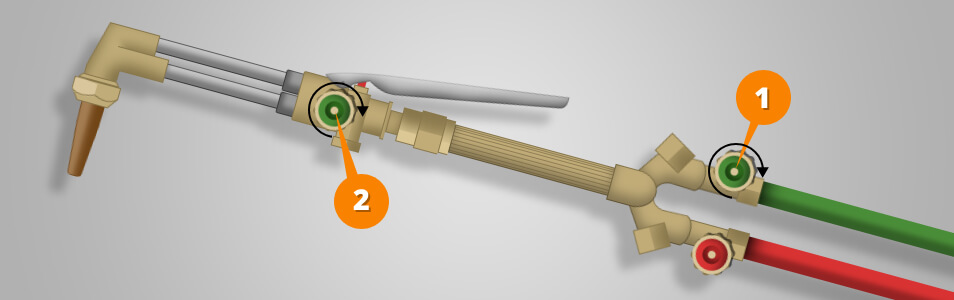
Using the torch involves a few key steps once your equipment (oxygen and acetylene tanks, regulators, hoses, and torch handle with appropriate tip) is properly set up and leak-checked. First, you'll open the acetylene valve slightly on the torch and ignite it, creating a sooty, orange flame. Then, you slowly introduce oxygen until you achieve a "neutral" flame – a bright blue inner cone with little to no soot, indicating the perfect balance of gases. This neutral flame is your primary tool for heating. For cutting, you'll use a specific cutting tip and introduce a high-pressure jet of pure oxygen once the metal is preheated, which oxidizes and blasts away the molten material, leaving a clean cut. For welding, you'll melt the base metal and often introduce a filler rod into the molten puddle.
Once you’re done working, remember to always shut down the torch properly. Close the oxygen valve on the torch handle first, then the acetylene valve. Then, close the main cylinder valves on the tanks and "bleed" the lines by opening the torch valves again to release any remaining pressure. This ensures the system is safely depressurized and ready for your next project. With practice, you’ll be amazed at what you can achieve with an oxy-acetylene torch, transforming raw metal into functional art or robust repairs. It’s a tool that empowers you to create, fix, and innovate – all with the captivating dance of fire!