
Imagine this: You're parked by a breathtaking lake, far from any noisy campgrounds or grumpy neighbors. The sun is shining, your coffee is brewing, and your devices are happily charging, all thanks to the magical power of the sun! That's the dream of RV solar, and it's totally within your reach.
Setting up solar panels on your RV might sound like rocket science, but trust us, it's more like putting together a super-cool, adult-sized LEGO set. Get ready to ditch those noisy generators and embrace the sweet, sweet silence of pure sunshine power. Let's make your RV a true off-grid champion!
Gather Your Solar Superpowers!
Before you become a solar wizard, you need your magical ingredients! Think of these as your essential tools for conjuring electricity right from the sky. Don't worry, we'll break down what each one does with a sprinkle of fun.
1. The Mighty Solar Panels
These are the flat, rectangular heroes that sit on your RV roof, soaking up all those glorious sunbeams. They're like little sun-eating magnets, converting light into usable electricity. You'll often see them as monocrystalline (usually black, super efficient) or polycrystalline (blueish, a bit less efficient but still great).
More panels mean more power, so dream big but also measure your roof! Think about how much energy your RV guzzles daily. Each panel is like adding another superpower to your rig!
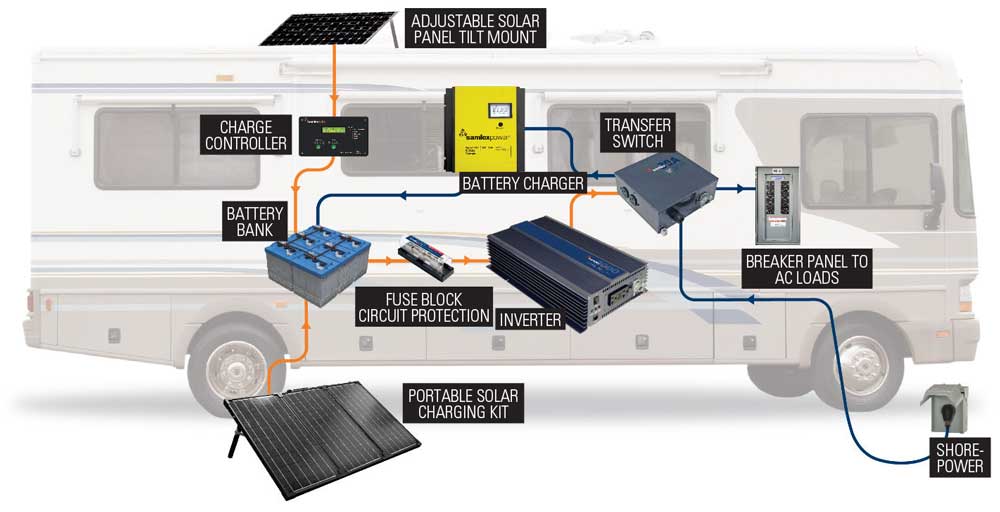
2. The Brainy Charge Controller
This little gadget is the real MVP, the wise old gatekeeper of your solar system. It sits between your panels and your batteries, making sure your batteries don't get overcharged or undercharged. Think of it as a super smart traffic cop for electricity.
You'll mostly hear about PWM (Pulse Width Modulation) and MPPT (Maximum Power Point Tracking) controllers. MPPT controllers are like the Ferrari of charge controllers; they're more efficient and will squeeze every last drop of juice from your panels, especially on cloudy days. PWM is simpler and more budget-friendly, still totally capable for many setups.
3. The Powerhouse Battery Bank
This is where all that lovely sun energy gets stored, like a piggy bank for electricity! Without batteries, your solar panels would only work when the sun is out, which isn't very helpful at night or on a rainy day. Your batteries let you access power 24/7, turning you into a true energy hoarder.
You'll need deep-cycle batteries, which are designed to be discharged and recharged many times. Options include AGM (Absorbed Glass Mat), Gel, or the increasingly popular Lithium Iron Phosphate (LiFePO4) batteries. Lithium batteries are lighter, last longer, and can be discharged deeper, but they do come with a higher upfront cost. They're the rock stars of RV batteries!
4. The Handy Inverter (Optional, but oh-so-nice!)
Your solar panels and batteries produce DC (Direct Current) power, which is great for charging phones or running small DC lights. But what about your coffee maker, microwave, or hair dryer? Those use AC (Alternating Current) power, just like your house outlets.
That's where the inverter swoops in! It's a magical device that converts your battery's DC power into household-style AC power. If you want to use regular wall plugs in your RV, you absolutely need an inverter. Think of it as giving your RV the power to run anything a normal house can, just on a smaller scale!
5. Wires, Fuses, and Mounts – The Unsung Heroes!
These are the trusty sidekicks that make everything happen safely and securely. You'll need sturdy solar panel mounts to attach your panels firmly to your RV roof. Nobody wants a flying solar panel in a strong gust of wind!
You'll also need appropriate gauge wiring (thicker wires for more power, like a bigger garden hose for more water flow) and fuses or circuit breakers. These safety devices are super important to protect your system from electrical oopsies. Always think safety first, like wearing a helmet when riding a bike!

Time to Get Zappy! (Installation Steps)
Alright, you've got your gear, now let's get down to business! This is where you transform your RV into a sun-powered fortress. Don't worry, we'll guide you through each step like a friendly tour guide.
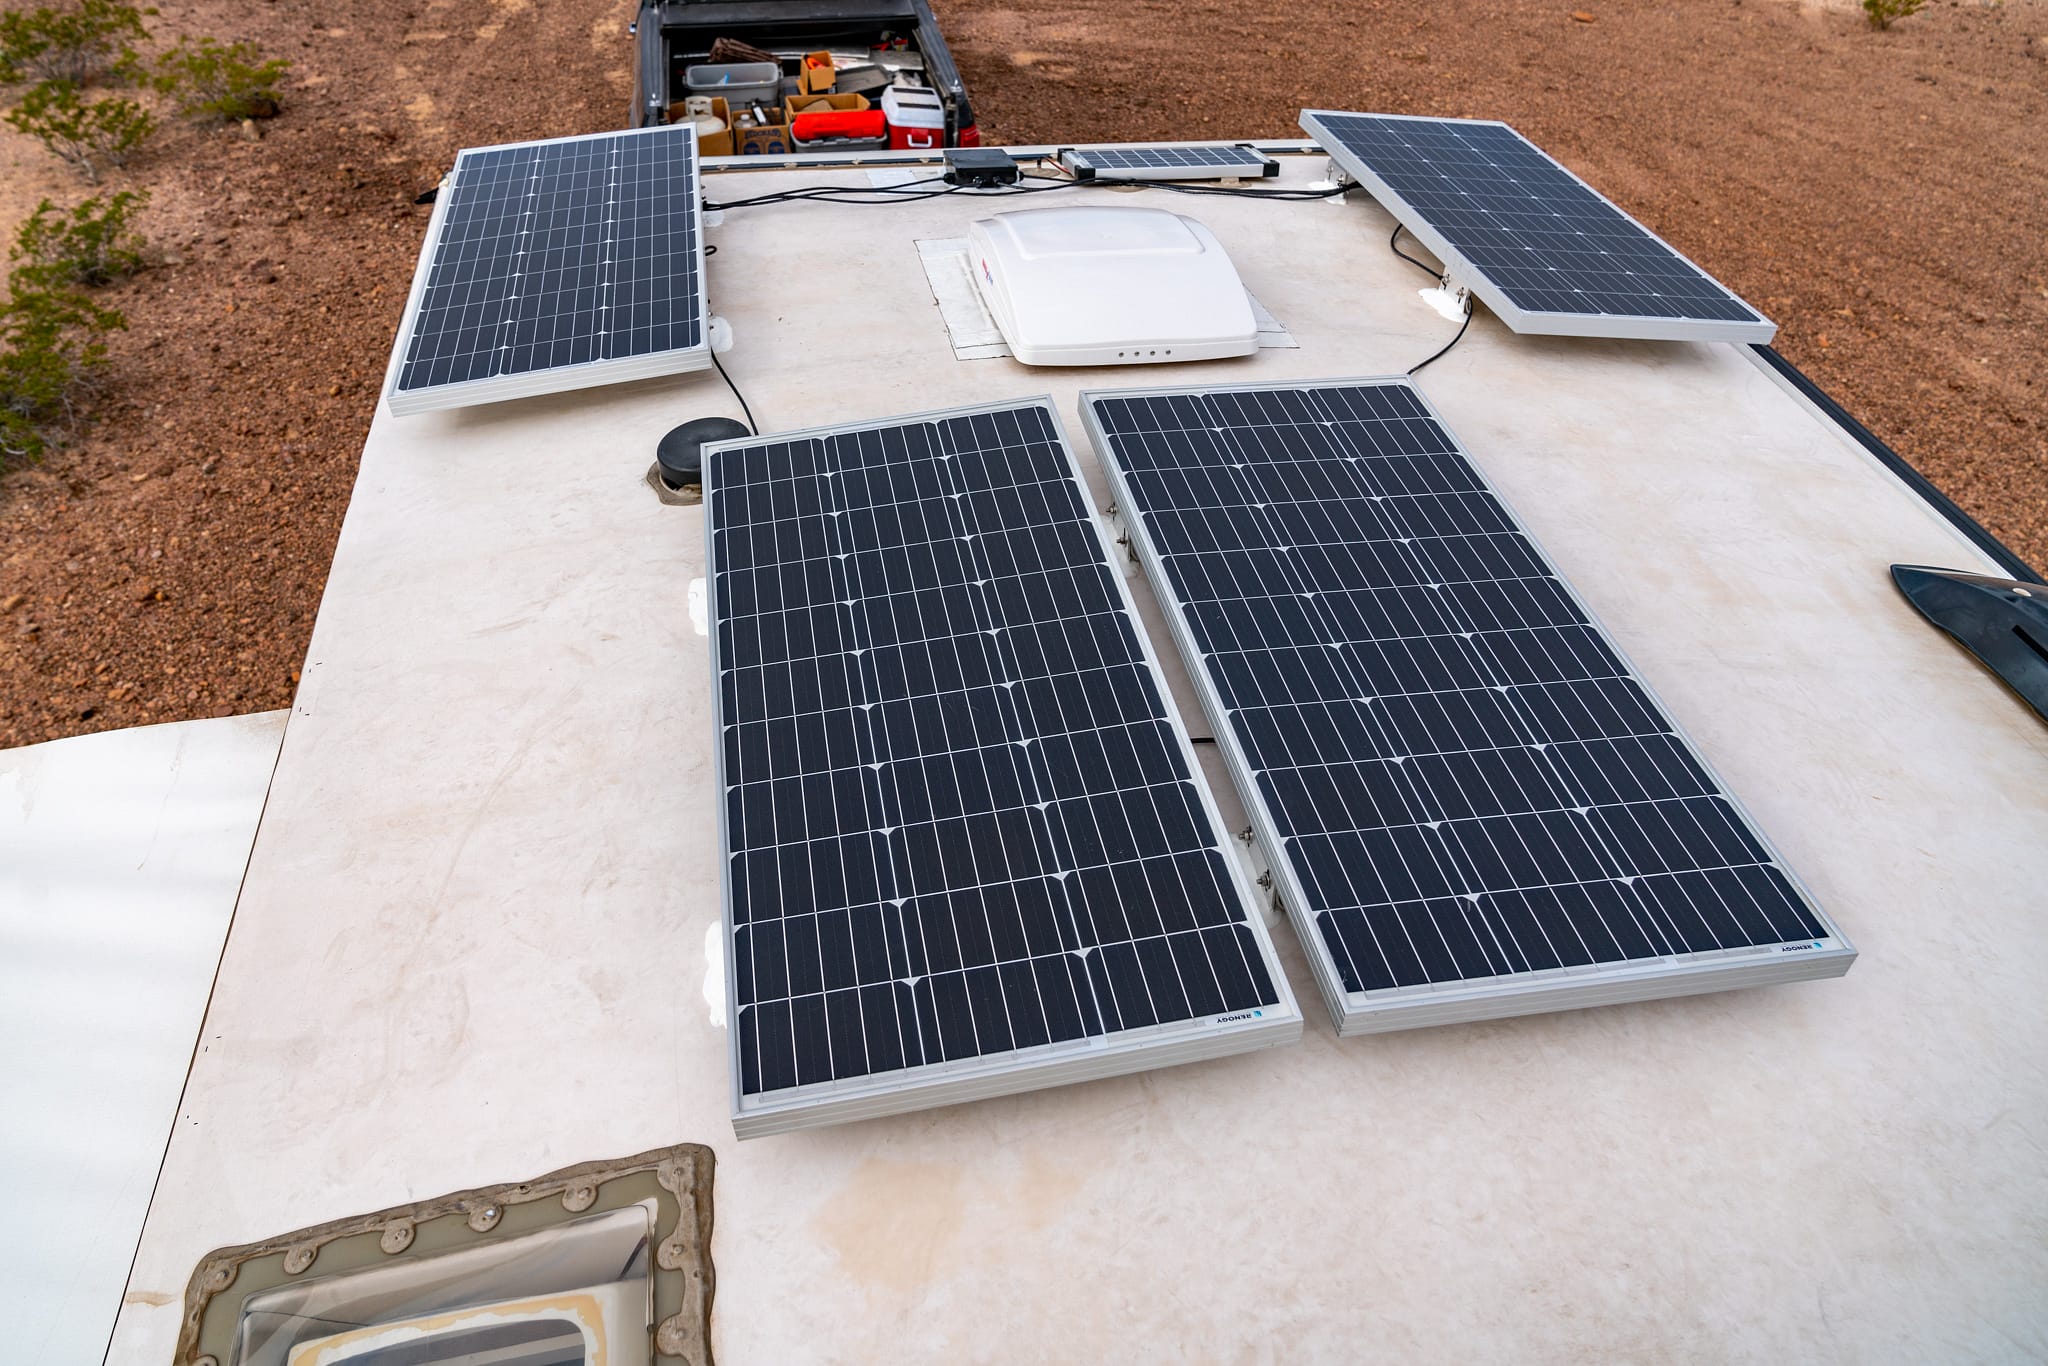
Step 1: Panel Placement – Find Your Sunny Sweet Spot!
First things first: decide where your panels will live on your RV roof. Look for flat, clear areas that get the most sunlight throughout the day. Try to avoid spots that get shaded by air conditioners, vents, or antennas.
Once you've found your prime real estate, securely attach your solar panel mounts to the roof. You might need to pre-drill holes and use plenty of sealant to prevent leaks – nobody wants a leaky roof! Make sure those panels are snug; they're going to be catching some wind while you drive.
Pro Tip: Before drilling, always check inside your RV for wiring, pipes, or structural supports. You don't want any unexpected surprises!
Step 2: Wiring Wonders – Connecting Your Solar Stars!
This is where your panels start talking to each other! You'll connect the wires from your panels together. Most RV systems use a series or parallel connection, depending on your system's voltage and current needs. For simplicity, often panels are connected in parallel to maintain a lower voltage but increase current, which is safer and more common for RVs.

Your panels will typically have positive (+) and negative (-) wires. Connect them up following your specific panel and charge controller instructions. Then, run a main positive and negative wire from your panels down into your RV, often through a special waterproof entry gland on the roof.
Step 3: Controller to Battery – The Juice Connection!
This is a super important step where the order absolutely matters! You always want to connect your charge controller to your battery bank FIRST. Think of it like this: the controller needs to know what kind of battery it's dealing with before it starts getting power from the panels.
Once the controller is happily connected to the battery (positive to positive, negative to negative), you can then connect the wires coming from your solar panels to the charge controller. It's like introducing the sun's magic directly to your energy piggy bank, with the controller making sure everyone plays nice.
Step 4: Adding the Inverter – Power for Your Gadgets!
If you've got an inverter, now's its time to shine! The inverter connects directly to your battery bank using very thick cables. Because inverters draw a lot of power, those cables need to be hefty to handle the load without overheating.
Make sure the inverter is installed in a well-ventilated area. Once connected, you can plug your regular AC appliances into the inverter or wire it into your RV's existing AC outlets. Now, that morning coffee maker can hum to life wherever you roam!
Step 5: Safety First, Always!
Remember those unsung heroes, the fuses and circuit breakers? They come into play now! Install appropriate fuses or circuit breakers on the positive wires: between your solar panels and the charge controller, and especially between your battery bank and the charge controller, and your battery bank and the inverter.
These are your system's safety nets, protecting against short circuits and overloads. Always follow the manufacturer's recommendations for fuse sizes. It's like putting a seatbelt on your electrical system – smart and absolutely necessary!
Flip the Switch and Shine!
Once everything is connected, double-check all your wiring connections to ensure they're tight and correct. Then, for the grand finale, turn on your charge controller and inverter!
Watch as your charge controller lights up, showing you the beautiful flow of energy from your panels to your batteries. You've done it! You've officially unleashed the power of the sun on your RV!
Now, go brew that coffee, charge those devices, and bask in the glow of your newfound solar freedom. You're not just an RVer; you're a solar-powered pioneer, a wizard of watts, a champion of off-grid living! High-five yourself, you've earned it!