
Alright, you magnificent DIY superstar! You've got that snazzy metal roof, shimmering in the sun, making your place look utterly fabulous. But every superstar setup has its secret handshake, its special sauce, its little trick to make it truly invincible. And today, we're tackling that glorious task of adding that extra layer of protection, that special touch that makes your roof sing with joy. Think of it as giving your roof a superhero cape in all the right places!
Forget complicated manuals and boring jargon. We're going to make this feel like building the coolest fort ever, but for grown-ups, on a roof! So, let's roll up those sleeves, put on your most optimistic grin, and get ready to work some magic!
Your DIY Treasure Chest: Gathering the Goods
First things first, let’s collect our trusty sidekicks! You’re not just gathering tools; you’re assembling your ultimate roof-flashing adventure kit. It’s like preparing for an epic quest, but instead of dragons, we’re battling… well, let’s just say we’re making sure your roof is utterly impenetrable and happy.
- The Star of the Show: You'll need your actual flashing material. This is that specialized, bendy, glorious stuff designed for this very job. Make sure it's the right kind for your specific roof's needs!
- The Precision Dancers: Grab some metal shears or snips. These are your trusty scissors for metal, ready to make neat, crisp cuts.
- The Mighty Sealant: Get yourself a tube of high-quality exterior sealant or caulk, and a caulk gun. This isn't just any goo; this is the super-duper, water-bouncing, weather-proof goo. It's your secret weapon for creating an invisible shield!
- The Little Grippers: You'll want some self-tapping metal roofing screws. These tiny champions hold everything firmly in place.
- The Hole-Making Wizard: A cordless drill with the appropriate bit for your screws is essential. This wizard makes quick work of securing your flashing.
- The Truth Teller: A tape measure, because precision is our middle name (or at least our very important friend).
- The Super-Suit: Don't forget your safety gear! Gloves, safety glasses, and sturdy shoes are like your personal force field. Your well-being is paramount, my friend!
The Warm-Up Act: Getting Ready to Rock!
Before the main event, a little prep work goes a long way. Think of it as clearing the stage for your roofing masterpiece!
Spotless Start
You’ll want the area where your flashing is going to be as clean as a whistle. No dirt, no grime, no sneaky little bits trying to interfere with your super-sealant. Grab a brush or a cloth and give it a good wipe-down. We want perfect adhesion, like a hug that never lets go!

Measure Twice, Cut Once (The Golden Rule!)
Now, this is where your inner architect shines. Take your tape measure, that trusty truth-teller, and carefully measure out the spots where your flashing needs to go. Mark your flashing material with a pencil or marker. Remember the old saying: measure twice, cut once! This isn't just a saying; it's a mantra for avoiding oopsie-daisies and keeping things perfectly tidy. When you're ready, grab those metal shears and make your cuts. Be brave, be bold, be accurate!
The Grand Performance: Making It Stick!
This is it! The moment you’ve been waiting for! We're about to bring your flashing vision to life!

Positioning for Perfection
Carefully take your perfectly cut piece of flashing and position it exactly where it needs to be. This might feel like a delicate dance, coaxing it into just the right spot. Take your time, line it up, and make sure it looks picture-perfect. Imagine you're wrapping a really important present, and you want the bow to be just so!
The Secure Sensation: Screws Away!
Once your flashing is perfectly nested, it’s time to bring in the little grippers and your hole-making wizard (the drill!). Start at one end and carefully drive your self-tapping screws through the flashing and into the roof structure below. Don't overtighten them, just snug enough to hold everything firmly. You’re essentially giving your flashing a firm, reassuring hug that says, "You're not going anywhere, buddy!" Space your screws out evenly, making sure every inch of that flashing feels loved and secure.
Remember, patience is a virtue, especially when you're making sure every screw is doing its job perfectly. You're building a fortress, one screw at a time!
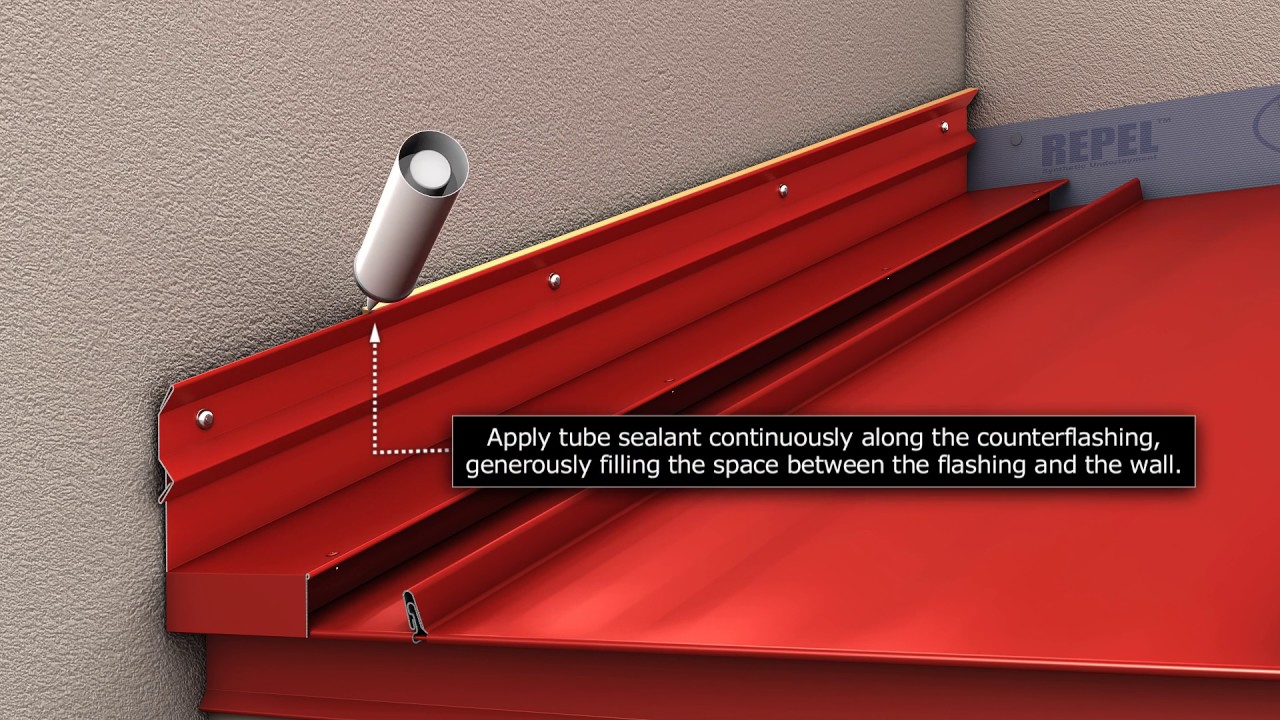
The Sealant Spectacle: Creating an Invisible Shield
This is where your super-duper, water-bouncing goo comes into play! Load your caulk gun with your sealant and apply a generous, continuous bead along all the edges of your flashing where it meets the roof panels or any other surface. Think of it as painting a magical, invisible line that water simply cannot cross. Make sure there are no gaps, no tiny little escape routes for mischievous moisture. You want a smooth, consistent line – a masterpiece of weatherproofing! Some folks even smooth it out with a gloved finger for that extra professional touch. You’re essentially putting a force field around your fantastic flashing!
The Victory Lap: Admire Your Handiwork!
You did it! Take a moment, step back, and admire your incredible work. You’ve successfully added that crucial layer of protection to your metal roof, ensuring it stands strong against whatever the skies throw at it. Your roof isn't just a roof anymore; it's a testament to your DIY prowess, your attention to detail, and your sheer awesomeness!
Feel that swell of pride? You’ve not only made your home better, but you’ve also unleashed your inner roofing superstar. Go on, give yourself a well-deserved pat on the back. You've earned it!
