
Ever looked at a piece of metal and thought, "Man, I wish I could just slice through that like butter?" Well, my friend, today's your lucky day because we're diving into the dazzling world of plasma cutting! It’s like having your own personal, hand-held lightning bolt, but, you know, much safer and more controlled. And way cooler than using a hacksaw, let's be honest.
Think of a plasma cutter as a super-fancy, high-tech torch that uses an electric arc and compressed air to create a superheated stream of plasma. This plasma is so hot it can melt through conductive metals faster than you can say "Look, no hands!" (But seriously, keep your hands on the torch.) Ready to become a metal-shaping wizard? Let's go!
Your Awesome Arsenal (aka What You’ll Need)
First things first, you can't be a superhero without your gear! Here’s what you’ll be suiting up with:
- The Plasma Cutter Itself: Obviously!
- An Air Compressor: This is the lungs of your operation, pushing all that lovely air through your machine. Make sure it can keep up!
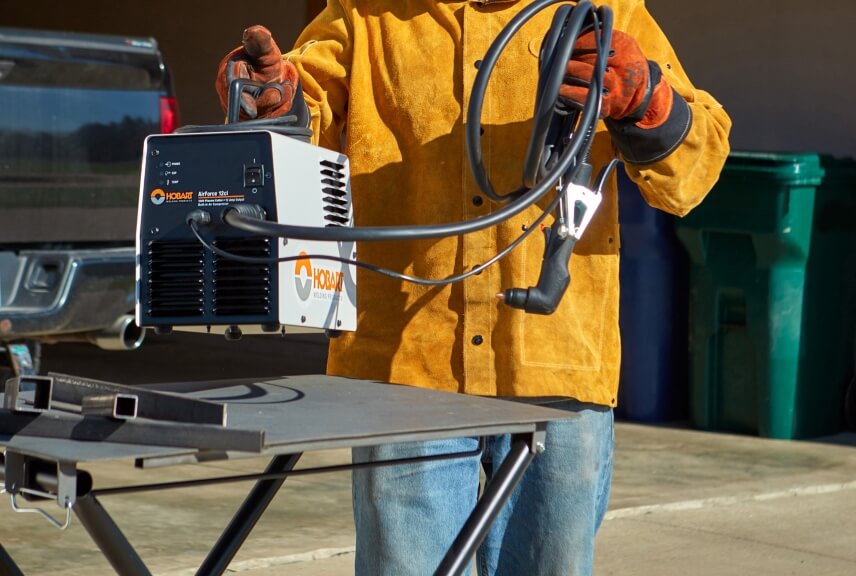
- Safety Gear (Your Force Field!): This isn't optional, it's mandatory. We’re talking:
- Welding Helmet: Or a plasma cutting specific helmet. Your eyes are precious! Don't skimp.
- Heavy-Duty Gloves: Think gauntlets, but for cutting.
- Long-Sleeved, Flame-Resistant Jacket/Clothes: Sparks fly, folks!
- Closed-Toe Shoes: No flip-flops, unless you like molten metal on your toes. (Spoiler: you don't.)
- The Metal You Want to Cut: Could be steel, aluminum, copper – whatever your heart desires, as long as it conducts electricity!
- A Clean, Well-Ventilated Workspace: Fumes are no fun.
Hooking It Up (It’s Easier Than IKEA Furniture)
Alright, let’s get this party started! Setting up your plasma cutter isn't rocket science, but paying attention here is key.
1. Power Up!: Plug your plasma cutter into an appropriate power source. Make sure it's rated for the machine – no daisy-chaining extension cords, please! We want power, not tripped breakers.
![How Do I Use a Plasma Cutter? – [Complete Beginner’s Guide]](https://powertoolsgeek.com/wp-content/uploads/2019/12/How-Do-I-Use-a-Plasma-Cutter.jpg)
2. Air Supply: Connect your air compressor to the plasma cutter. Your machine will have a pressure regulator, so dial it in to what your manual recommends. Too little air, and your cut will be wimpy. Too much, and it's like a sneeze – messy!
3. The Ground Clamp (Your Unsung Hero): This little alligator clip is super important. Clamp it firmly onto the metal you're cutting. It completes the electrical circuit, so without it, nothing happens. It's like making sure your metal is properly grounded and not just floating around hoping for a spark.
4. Consumables Check: The "consumables" are the little bits inside your torch that actually create the plasma arc – the electrode and the cutting tip. Give them a quick check. If they look worn or cratered, swap 'em out. Happy consumables make happy cuts!

Time to Cut! (The Moment You've Been Waiting For!)
Safety gear on? Check! Machine plugged in and air connected? Check! Ground clamp on? Check! Let's make some magic happen!
1. Get a Grip: Hold the torch comfortably. Most people hold it like a pencil, but a little more robustly, you know? Steady hands make pretty lines.
2. The Pilot Arc: When you squeeze the trigger, you'll hear a click and see a tiny little spark shoot out from the tip. That's your "pilot arc" – it's basically saying, "Hey metal, ready to party?"
3. Initiate Contact (or Almost!): Bring the torch tip close to the edge of your metal. Some plasma cutters are "drag-tip," meaning you can lightly drag the tip directly on the metal. Others require a slight "stand-off" distance (a tiny gap). Your manual will tell you which type you have. Don't touch the tip to the metal if it's not a drag-tip machine!
4. The Cut!: Once the pilot arc transfers to the workpiece and the main plasma stream ignites, you'll see a glorious shower of sparks shooting downwards from the bottom of your material. This is your cue! Start moving the torch at a steady pace.
5. The Goldilocks Zone of Speed:

- Too Fast: You'll get a shallow cut, or worse, just scorch marks. The plasma didn't have time to melt through.
- Too Slow: You'll end up with a big, wide kerf (the cut line) and a lot of dross (melted slag that sticks to the bottom). It's messy!
- Just Right: A good cut will have minimal dross, a clean edge, and a consistent shower of sparks from the bottom. You'll hear a consistent "roar" and feel like a total boss.
Pro Tip: Always start on some scrap metal! Get a feel for the speed and distance. Practice makes perfect, or at least, way less messy.
A Few More Pointers for Peak Performance
- Clean Metal is Happy Metal: Rust, paint, or heavy scale can interfere with the electrical connection and give you a shoddy cut. Clean it up a bit first.
- Amperage Matters: Your machine has an amperage setting. Thicker metal needs more amps; thinner metal needs less. Consult your manual for recommended settings. It's like choosing the right power level for your laser sword!
- Ventilation, Ventilation, Ventilation: We can't stress this enough. Plasma cutting creates fumes. Work outdoors or in a very well-ventilated area, or use a fume extractor. Your lungs will thank you.
Go Forth and Sparkle!
And there you have it! Operating a plasma cutter isn't nearly as intimidating as it looks. With the right safety gear, a little practice, and a dash of daring, you'll be zipping through metal like a pro in no time. Imagine the possibilities! Custom art, cool brackets, fixing up that old rusty project... the world of metal fabrication is now your oyster.
So, grab your gear, fire up that machine, and let your creativity flow. Get ready to hear that satisfying sizzle and see those sparks fly. You've got this! Now go make something awesome and leave the world a little shinier.