
Ever dreamt of harnessing the sun's glorious power right from your rooftop? There’s something incredibly satisfying about transforming your home into a personal power plant. It's not just good for the planet; it's a savvy move for your wallet, and frankly, it feels pretty heroic. Ready to elevate your eco-game? Let’s talk about getting those shiny solar panels onto your roof, in an easy-going, totally doable way.
Prepping for Your Sunny Adventure
Think of this as your solar panel pre-flight check. A little preparation goes a long way to ensure a smooth, successful liftoff for your panels.
First things first: permits. These are your golden tickets! Each municipality has its own rules, so a quick chat with your local building department is non-negotiable. They'll tell you about structural requirements, electrical codes, and what paperwork you need. Think of it like getting permission to throw the coolest block party on your roof – you gotta check with the neighbors first!
Safety first, always! We’re talking about getting on a roof, so proper safety gear is paramount. A sturdy ladder, a fall arrest harness, non-slip shoes, and good gloves are your best friends up there. It’s like preparing for a mini-expedition – you wouldn’t climb Mount Everest in flip-flops, right?
Next, gather your tools. You’ll need a stud finder (for locating rafters), a drill, a wrench set, a tape measure, a caulk gun (for sealant), and maybe an extra pair of hands from a friend. Consider it your DIY "Avengers" assemble moment!

Finding Your Roof's Strong Bones: Rafters
Alright, you’re up on the roof (safely, of course!). The first crucial step is to locate your roof rafters. These are the strong, load-bearing beams beneath your roofing material, and they are where your solar panels will ultimately be anchored. Using a stud finder designed for roofing materials, or even carefully tapping and listening for a solid sound, you'll mark where these rafters lie. Precision here is key! It’s like finding the perfect foundation for a magnificent sculpture.
Fun Fact: Did you know the concept of harnessing solar energy dates back to the 3rd century BC when Greeks and Romans used "burning mirrors" to ignite torches? Fast forward a few millennia, and we're just a few steps from powering our homes!

Mounting the Magic: Flashing and L-Feet
Once your rafters are mapped out, it's time for the mounting hardware. You’ll be installing flashing and L-feet. The flashing is a crucial waterproofing element. You’ll lift a shingle, slide the flashing underneath, and screw it directly into the rafter. Then, a generous bead of high-quality sealant goes around and over the screw holes. This step is non-negotiable for preventing leaks! Nobody wants a rainy day surprise inside.
The L-feet (or similar mounting brackets) then attach directly to the flashing. These are the sturdy little platforms where your solar panel rails will eventually sit. Make sure they’re all aligned and level – a bit like setting up dominoes, but much more structurally sound!
Building the Framework: The Railing System
With your L-feet securely in place, it's time to attach the rails. These are long, aluminum tracks that run parallel to your roofline (or whatever angle you've chosen for optimal sun exposure). The panels themselves will clamp onto these rails. You’ll connect the rails to the L-feet using specialized bolts and clamps. Double-check that your rails are perfectly straight and level across the entire array. This ensures your panels will sit uniformly and look fantastic.

Take your time here. It’s not a race; it’s a craft. Every meticulous measurement and tight screw contributes to the longevity and efficiency of your solar system. Think of it as building a mini-highway for electron traffic!
The Grand Finale: Securing Your Solar Panels
Now for the main event! Carefully lift each solar panel onto the rails. This is where that extra pair of hands truly shines. Each panel will have specific clamps that secure it to the rails. These clamps typically fit into grooves on the panel frame and then bolt down onto the rails. Handle the panels gently; they’re resilient but not indestructible.
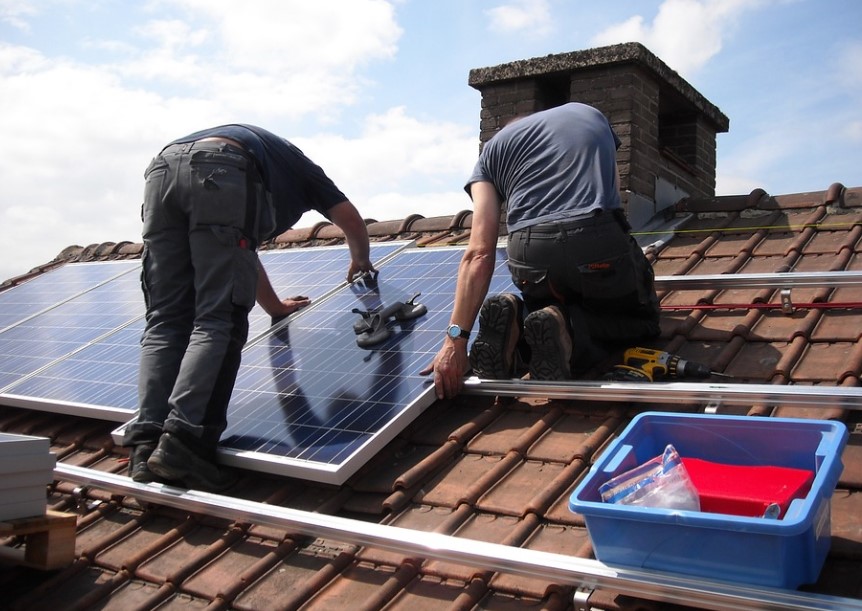
Once all the panels are securely clamped, you'll move on to the electrical connections. This usually involves plugging in MC4 connectors between panels and connecting them to your inverter. While the physical mounting is a great DIY project, we highly recommend having a qualified electrician handle all the electrical wiring and grid connection. Safety and compliance are paramount here!
A Sustainable Sunset
There it is! Your very own solar array, gleaming under the sun. Mounting solar panels to your roof might seem like a daunting task at first, but with careful planning, attention to safety, and a good dose of patience, it's an incredibly rewarding project. You’re not just installing equipment; you’re investing in energy independence, reducing your carbon footprint, and adding value to your home.
Imagine sipping your morning coffee, knowing the sun above is not just warming your day, but powering your home. Every flick of a light switch, every charge of your phone, every hum of your fridge, is now a testament to your hands-on commitment to a greener future. That, my friend, is a pretty epic feeling. You’re not just a homeowner; you’re a home-powerer!