So, you've joined the EV revolution! Congrats! You're probably loving the silence, the torque, and the smug feeling of cruising past gas stations. But let's be real, that little Level 1 charger that came with your car? It's about as fast as a snail on a leisurely stroll. You're ready to upgrade, ready to experience the true joy of waking up to a fully charged ride. And that, my friend, means it's time to talk about installing a 240v outlet for Level 2 charging. Don't sweat it, we're going to break this down like a friendly chat over coffee!
Think of it this way: a 240v outlet is like giving your car a big, refreshing gulp of electricity instead of a tiny sip. It's the difference between charging all day and charging in a few hours. Pretty sweet, right?
Hold Up! Safety First, Always!
Before we even think about touching wires, let's get one thing straight: electricity is not a toy. It's powerful, it's invisible, and it demands respect. If at any point you feel unsure, overwhelmed, or like you might accidentally invent a new form of human-powered electricity generation (bad idea!), please, please, please call a qualified electrician. Seriously. This isn't just about saving your car; it's about saving you. Consider this your official "don't be a hero" disclaimer. You're welcome.
What You'll (Probably) Need
Assuming you've decided to tackle this (with appropriate caution, of course!), here's a general shopping list:
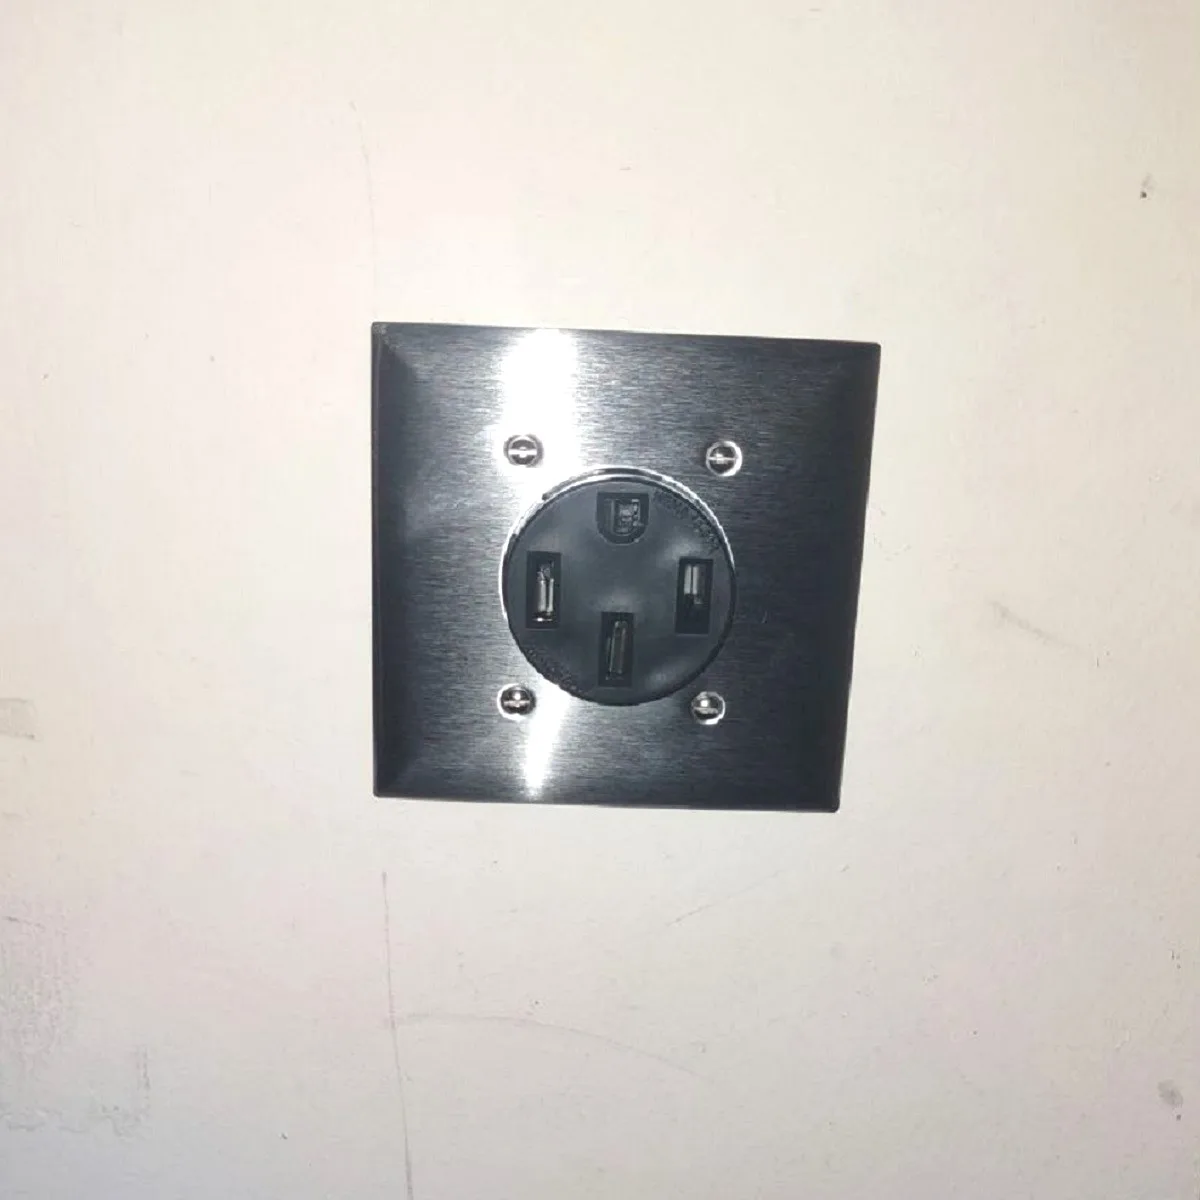
- A NEMA 14-50R or 6-50R outlet (check your EVSE – that's your charger – to see which one it needs).
- A compatible double-pole circuit breaker (usually 50 amps for a NEMA 14-50).
- Appropriate gauge wire (usually 6-gauge for a 50-amp circuit). This is crucial! Too thin, and you've got problems.
- Conduit and connectors (if running the wire exposed).
- A junction box for the outlet.
- Tools: Screwdrivers, wire strippers, voltage tester (a must-have!), lineman's pliers, drill, stud finder.
- And maybe a calming beverage for after you're done.
Step 1: The Grand Tour – Your Electrical Panel
This is where the magic (and a little bit of math) happens. You need to peek into your main electrical panel. Ask yourself:

- Do I have space for a new double-pole breaker?
- Is there enough amp capacity in my service to handle an EV charger? This is the big one. If your panel is already nearing its limit, adding a massive draw like an EV charger could overload it. This is a prime example of when to call an electrician. They can perform a load calculation to be sure.
Think of your breaker panel as a slightly intimidating but ultimately helpful electrical brain. You want to make sure it can handle the new thoughts you're about to give it.
Step 2: Planning the Route
Where's your car going to charge? How far is that from your panel? You'll need to run your wire from the panel to the chosen spot. Try to keep the run as short and direct as possible. This isn't just for convenience; shorter runs mean less voltage drop and less work for you. Will it be through walls? Along a garage ceiling? Plan it out like a secret agent mission!
Step 3: Power Down! Seriously!
I cannot stress this enough: TURN OFF THE MAIN BREAKER TO YOUR ENTIRE HOUSE before you do anything inside the panel. Use your voltage tester to confirm that there's no power at the main lugs. We're talking zero volts. If you're not absolutely sure, or your tester isn't cooperating, just don't touch anything. Better safe than sorry, always.
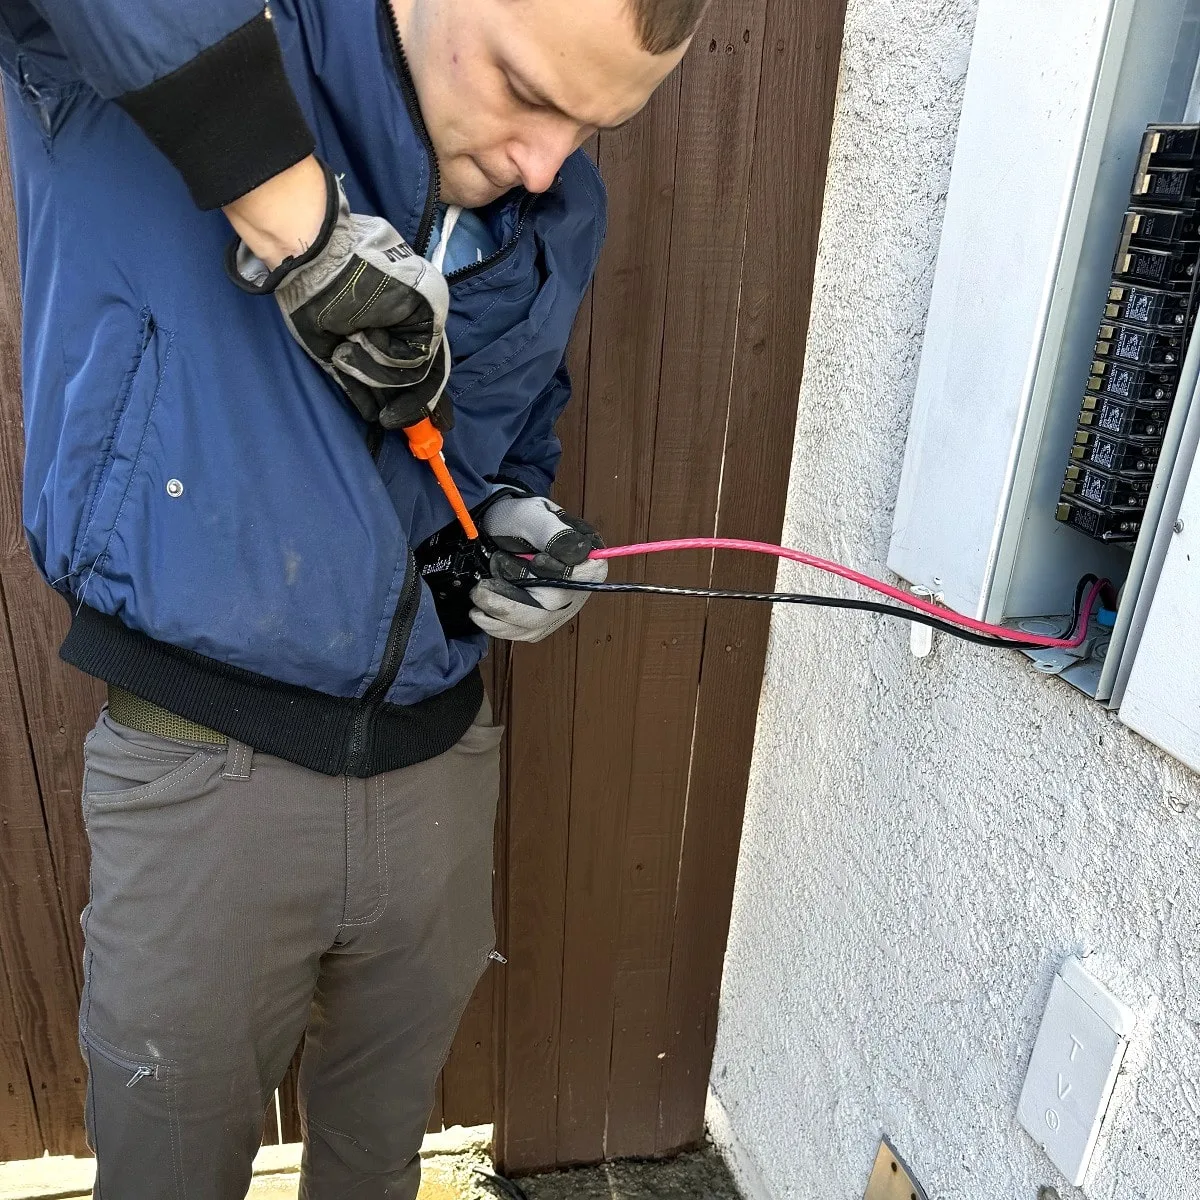
Step 4: Wiring It Up (The Colorful Bit!)
Okay, deep breath. Here's a simplified look at the wiring for a NEMA 14-50 outlet (which has four slots):

- Black wire: Connects to one hot terminal on your new double-pole breaker.
- Red wire: Connects to the other hot terminal on your new double-pole breaker.
- White wire: This is your neutral. It connects to the neutral bus bar in your panel (the silver bar with lots of white wires).
- Green or bare copper wire: This is your ground. It connects to the ground bus bar in your panel (often the same as the neutral bar, or a separate one).
At the outlet end, connect these same colored wires to their corresponding terminals. The NEMA 14-50 has clearly labeled screw terminals inside for hot (brass), neutral (silver), and ground (green). Double-check every connection! Make them tight, secure, and clean. No loose strands, please!
Step 5: Testing, Testing... 1, 2, 3!
Once everything is connected (and your outlet is securely mounted in its box), it's time for the moment of truth. Before turning on the main power, ensure your new breaker is in the "off" position. Then, flip your main breaker back on. Now, carefully flip your new EV charger breaker to "on."

Using your voltage tester, check the slots of the outlet. You should see around 240v between the two hot slots, 120v between each hot slot and neutral, and zero between ground and anything else (unless you have a fancy tester that shows continuity). If anything looks funky, turn it all off immediately and re-check your work (or call that electrician!).
Step 6: Plug It In and Charge On!
If all your tests pass with flying colors, congratulations! You've done it! Plug in your EVSE, plug it into your car, and watch that charging rate soar. Say goodbye to range anxiety and hello to the sweet, sweet sound of a quickly filling battery.
You’re a Charging Rockstar!
Whether you've bravely installed it yourself or smartly called in a pro, you've taken a huge step toward making EV ownership even more convenient and enjoyable. You're no longer just driving an electric car; you're mastering the electric car lifestyle. Now go forth, charge up, and enjoy the open road with a smile, knowing your ride is always ready for the next adventure!