
Alright, let’s be honest. You’ve just rolled into your campsite, sun setting, birds chirping, maybe a faint smell of pine in the air. You open the camper door, ready to flick on a light, crank up some tunes, or maybe even fire up the microwave for that emergency mac and cheese. And then… nothing. Just the deafening silence of a dead or, worse, unhooked camper battery. It’s like discovering your morning coffee maker suddenly speaks an ancient language. Don't sweat it! Hooking up a camper battery isn't a secret ritual reserved for seasoned mechanics. It's more like solving a very simple, very satisfying puzzle, and we’re going to do it together.
Think of your camper battery as the heart of your mobile home. Without it, you’re just a fancy box on wheels. With it? You've got lights, fans, water pumps, and all those glorious little conveniences that make camping feel less like roughing it and more like a cozy getaway. It's truly what transforms your rig from a glorified shed into a sanctuary on wheels. So, let's get that heart pumping!
First Things First: Safety (The Un-Scary Version)
Before we start playing doctor with your camper, a tiny word on safety. We’re not talking about wearing a hazmat suit, but a little common sense goes a long way. Think of it like cooking: you wouldn’t stick your hand in a hot oven, right? Same principle. Wear some old gloves and maybe even safety glasses if you’re feeling particularly cautious. Batteries can sometimes be a bit dramatic, letting off a spark or two if you're not careful, and you definitely don't want to become an impromptu human light show. Also, make sure your camper is turned off. No power draw means no accidental zaps. It's like unplugging your toaster before trying to fix it.
What You'll Need (The Camper’s Toolbox Edition)
You probably already have most of this stuff lurking in your garage or utility drawer. It's not like you're building a rocket ship here:
- A wrench (usually 1/2" or 9/16") to tighten those terminal nuts.
- A wire brush or battery terminal cleaner. Trust me, clean connections are happy connections.
- Maybe some baking soda and water, or a specialized battery cleaner, if your terminals look like they’ve been to war.
- Those aforementioned gloves and safety glasses.
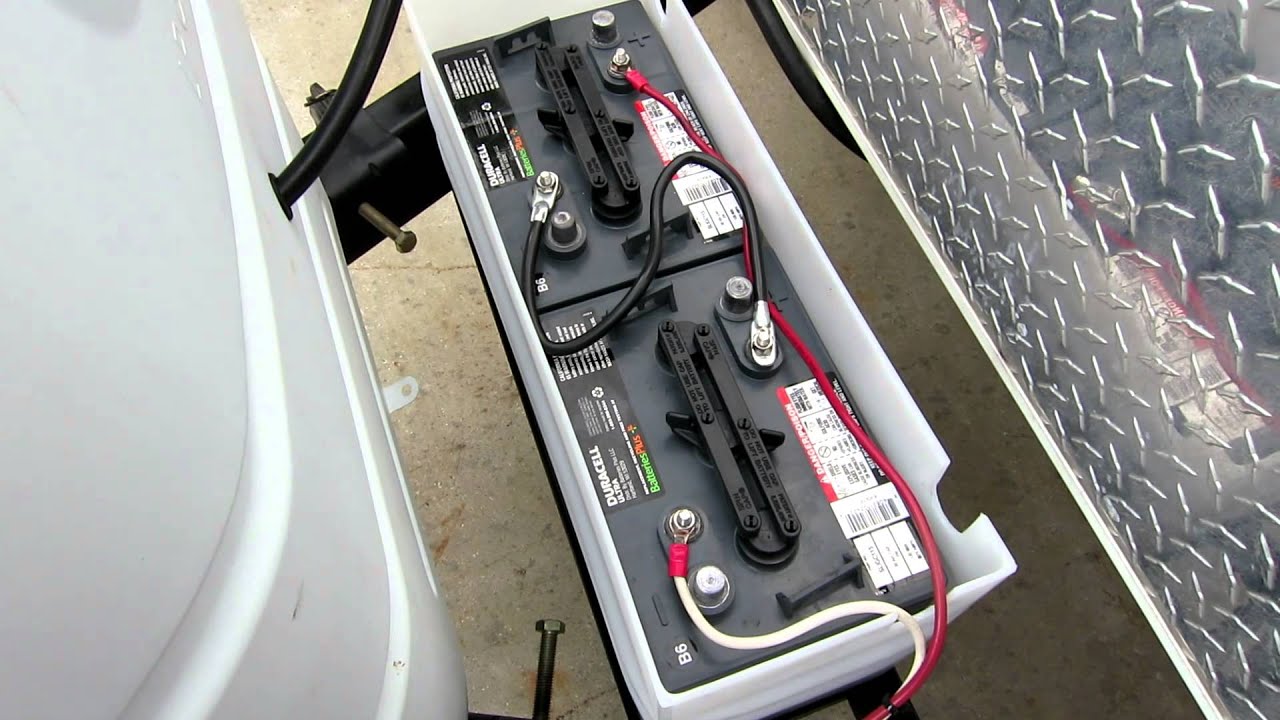
Getting Acquainted With Your Battery: The "Plus" and "Minus" Show
Your battery has two main connection points, called terminals. One is usually marked with a "+" sign and is often red. This is your positive terminal, the "good guy" bringing the power. The other will have a "-" sign and is usually black. This is your negative terminal, the "return path" for the electricity. It's crucial to know which is which, like knowing your left from your right on a dance floor.
Step 1: The Prep Work – Cleanliness is Next to Electrically-Sound Connections
Find your battery, often in a dedicated box or compartment. It might look a bit dusty, or even have some greenish-blue crusties (corrosion) on the terminals. This is where your wire brush or terminal cleaner comes in. Give those terminals a good scrub until they’re shiny and metallic. Think of it like clearing the path for a smooth, uninterrupted flow of electron traffic. If there’s serious gunk, a baking soda and water paste (then rinsed and dried) works wonders. Clean connections are key for a strong power flow.
Step 2: Connecting the Red Cable (Always Positive First!)
Now for the main event! Grab your red cable (the positive one) and find the battery terminal with the "+" sign. Place the red cable connector onto the positive post. Take your wrench and tighten that nut down. You want it snug, but not so tight you're going to strip anything. Imagine tightening a jar lid – firm but not Herculean. This is probably the most important rule: always connect the positive (red) cable first! This minimizes the chance of accidental sparks if your wrench happens to touch the camper frame.
Seriously, it’s like putting on your right shoe before your left. There’s a specific order, and it matters.

Step 3: Connecting the Black Cable (The Grand Finale)
With the red cable securely in place, it’s time for the black cable (the negative one). Find the "-" terminal on your battery. Attach the black cable connector to this post, and once again, snug it down with your wrench. See? Not so scary, was it? You've just performed electrical surgery, practically.
Step 4: Double-Check Everything
Before you get too excited, just give all the connections a gentle tug to make sure they're secure. Wiggle the cables a bit. You don’t want anything coming loose when you hit a pothole. It should feel sturdy, like a well-built LEGO structure.

Step 5: The Moment of Truth – Power On!
Now, for the big reveal! Head inside your camper and try a light switch or the radio. Did it spring to life? If so, congratulations, you glorious battery whisperer! You’ve successfully hooked up your camper battery and unleashed the magic within. It’s a pretty great feeling, isn't it? Like you’ve just won a tiny, personal battle against the forces of darkness (and silence).
What If It Doesn't Work? (The "Did You Plug It In?" Moment)
Don't panic! Even the pros have moments. If nothing happens, here are a few quick checks:
- Are the connections super clean and tight? Go back to step 1 and 4.
- Is the battery actually charged? Sometimes, you hook it up perfectly, but the battery itself is just flat. You might need to hook it up to a charger for a bit.
- Is there a main disconnect switch inside your camper that's still off? Some campers have a "battery disconnect" switch, often near the entrance. Make sure that's flipped to "on."
You did it! See? No smoke, no sirens, no emergency calls to a mechanic. Just you, your wrench, and a now-powered-up camper ready for adventure. Now go enjoy those lights, that fridge, and maybe even that emergency mac and cheese. You've earned it!
