
So, you've seen those fabulous folks with perfectly sun-kissed strands framing their face. They look effortlessly chic, like they just woke up flawless. You think, "Hey, I could totally do that myself!"
It’s called a money piece. It's meant to brighten your face and make you look like a million bucks. But let's be real, the idea of doing it at home often feels like a secret mission.
You scroll through TikTok, watch a few quick videos. "Oh, that looks easy enough!" you mumble to your reflection. Just a little bit of bleach, a few foils, and bam! Instant salon results, right?
"Why pay a professional when YouTube taught me everything I need to know?" – Your inner voice, probably.
Now, hold onto your metaphorical hair-dye-stained towels. Because while the internet is a beautiful place, it also holds many secrets. Secrets like, how much harder this really is.
The Grand (Mis)Adventure Begins
Step 1: Gathering Your "Professional" Tools
First things first, you need supplies. Skip the fancy beauty store with all its confusing labels. Your bathroom cabinet likely holds all the essentials.
That box of hair lightener you bought three years ago for an impulse streaking decision? Perfect. Bonus points if it's already open.
Foil? Grab a roll from the kitchen. The shinier, the better for that professional feel. An old toothbrush makes an excellent application brush.
Don't forget the mirror. The bigger the better, for admiring your work in progress. And maybe a few old towels you won't mind turning into abstract art.
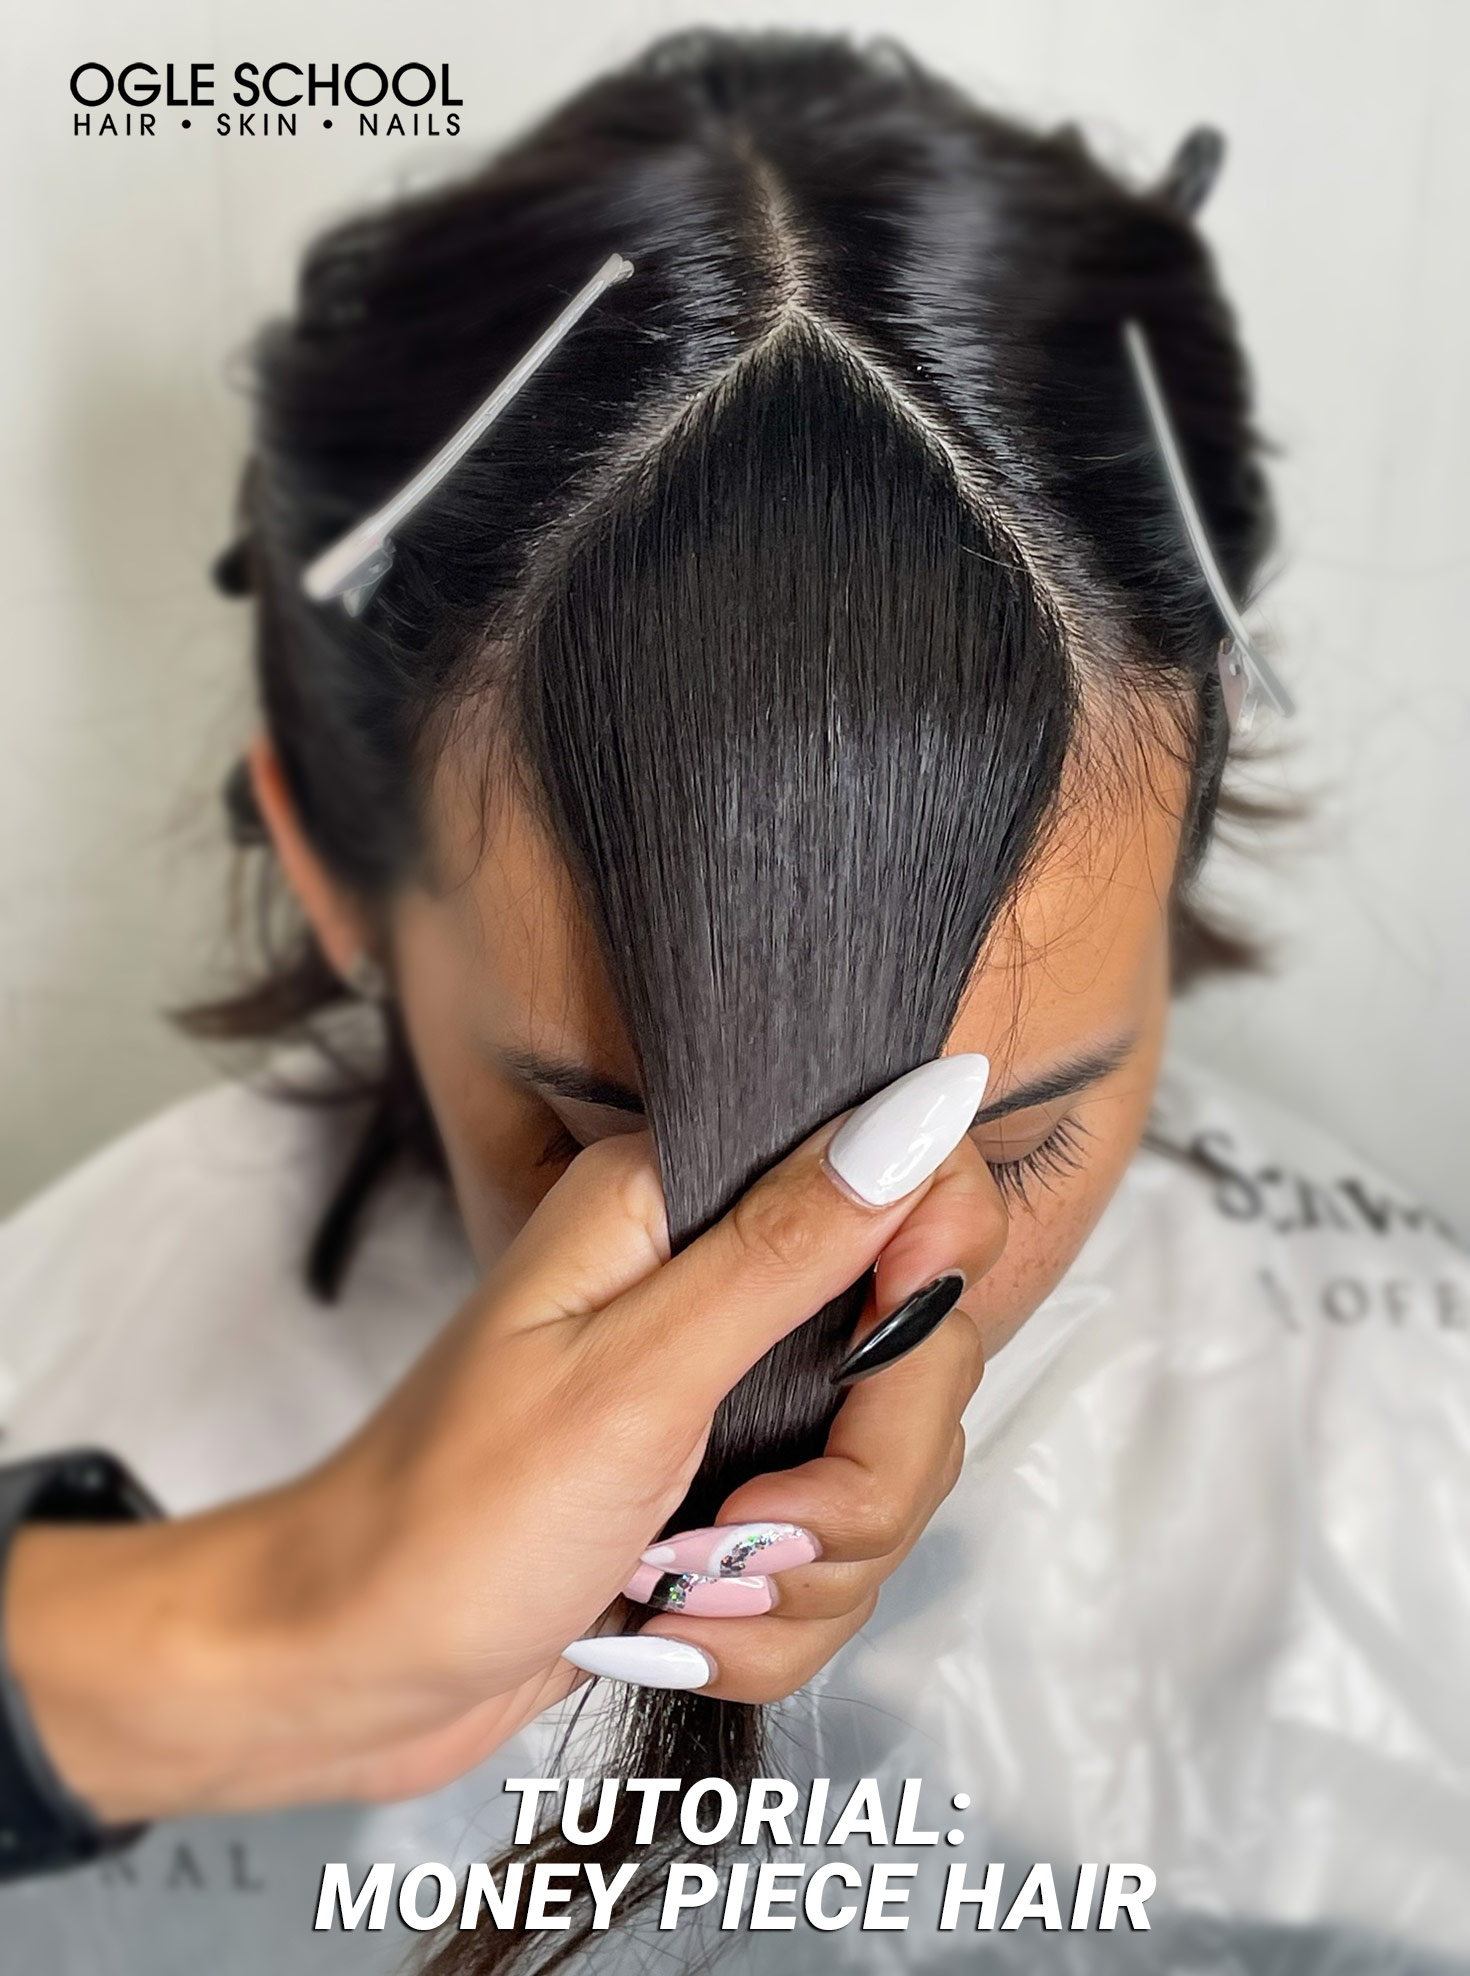
Step 2: The Art of "Sectioning" (aka Guessing)
This is where the magic (or mayhem) truly begins. You need to pick the pieces of hair that will become your dazzling money piece. Think of them as your hair's golden ticket.
Start by making a part down the middle of your head. Now, from that part, select a small section on each side. How small? Well, that's the fun part – it's entirely up to you!
Too thick, and you risk looking like a badger. Too thin, and nobody will even notice your hard work. It's a delicate balance, much like juggling flaming torches.
Remember, the goal is "brightening," not "striping." Unless you're going for a tiger-esque vibe.
Some might suggest using clips. But where's the adventure in that? Just hold it with your teeth, or maybe balance a spoon on your head. Resourcefulness is key here.
Step 3: The Bleach-y Blob Application
Now for the main event: mixing your potion. Follow the instructions on the box. Or, you know, just eyeball it. A little extra developer never hurt anyone, right? (Spoiler: It absolutely can.)
Stir it with the back of that toothbrush. Make sure it's a nice, lumpy, pale blue consistency. Consistency is... a suggestion.
Take your chosen section of hair. Now, with your trusty toothbrush, generously apply the bleach. Get it all over! The more coverage, the better the result, logically speaking.
Don't worry about getting it on your forehead. That's just a little extra glow for your skin. Or, you know, a slight chemical burn. Embrace the journey!
Once saturated, carefully wrap each section in your kitchen foil. Try not to crinkle it too much. You're aiming for sleek, not baked potato.

"Is it supposed to feel warm? A little tingly? Oh, definitely tingly." – Thoughts you might have.
Step 4: The Tense Waiting Game
This is perhaps the most crucial part. The timing. The box says 20-45 minutes. But your hair is unique, a special snowflake. So, you'll know when it's done.
Every five minutes, unwrap a corner of foil. Peek inside. Is it a lovely shade of dandelion yellow? Perfect!
Or is it still dark? Leave it longer. Don't be afraid to leave it for an extra 10 minutes. Or 20. Blonde hair is a commitment.
What's a little extra processing time between friends? The smell, by the way, is just the sweet scent of transformation. Don't mind it.
It’s the smell of success, or possibly burning hair. One of the two.
Step 5: The Grand Reveal (and Potential Regret)
Okay, time's up! Head to the sink. Rinse out the bleach. Thoroughly. Like, really, really thoroughly. You don't want any lingering chemicals having a party on your scalp.
Pat it dry gently. Now, approach the mirror. Take a deep breath. This is the moment you've been waiting for. Your money piece is about to shine.

You gaze upon your reflection. And... oh.
"Is that... orange? Or is it more of a brassy yellow? Hmm. Interesting." – Your first, slightly bewildered, thought.
Perhaps it's a little uneven. One side might be brighter than the other. Or maybe the section you picked is, in fact, quite wide. Wide like a highway.
Don't panic! This is just "character." It's "rustic." It's "unique." Nobody else will have a money piece exactly like yours. That's a guarantee.
Step 6: The "Fix-Up" (aka Damage Control)
So, it's not quite the platinum blonde goddess look you envisioned. Fear not! There are solutions.
First, the obvious: a hat. A stylish wide-brimmed hat can cover a multitude of sins. Or a really thick headband.
Secondly, search for that purple shampoo you saw somewhere. It promises to banish brassiness. Does it work instantly? Maybe!
Or it might just turn your already-yellow hair a slightly different shade of lavender-yellow. A deep conditioning mask. Your hair will thank you.

Or cry out in despair. Either way, it needs moisture after its little bleach adventure.
Remember, patience is a virtue. And sometimes, so is booking an emergency appointment with a real, live hair stylist. They're like magicians, but with less glitter and more toner.
The Unpopular Truth
While the allure of a DIY money piece is strong, like a siren's call to your wallet, let's have an honest moment. This isn't just about saving a few bucks.
It's about the thrill of the chase, the joy of experimentation, and the undeniable satisfaction of telling yourself, "I did it myself!"
But then you look in the mirror again. And you think, "Okay, maybe some things are best left to the experts." That perfectly blended, effortlessly bright look? It takes skill.
"The true cost of a DIY money piece isn't just the bleach. It's the hat you have to buy, and the eventual salon fix-up." – A wise, slightly humbled, person.
So, next time that urge strikes to become your own personal stylist, remember this little guide. Remember the toothbrush, the kitchen foil, and the unique shade of "sunny-side-up."
And then, perhaps, just perhaps, you might just pick up the phone. Because a true money piece isn't just about the color. It's about the confidence that comes from a job beautifully, professionally done.
Your hair (and your future self, looking at old photos) will silently thank you. Or loudly thank you, for avoiding a follicular disaster.