Ever found yourself staring at a magnificent 3D print model, only for your printer to suddenly start acting like it’s having a bad hair day? Streaky lines, blobs, or worse, no filament coming out at all? Welcome to the club! 3D printing is an incredibly rewarding hobby, letting you bring digital designs to life with a satisfying whirr and clack. But like any intricate magic, it sometimes needs a little TLC. And often, the unsung hero (or villain, depending on its mood) is your 3D printer nozzle.
Cleaning your nozzle might sound like a chore, but trust me, it’s one of the most empowering and useful skills a 3D printer enthusiast can master. Think of it as giving your printer a spa day! It's not just about fixing a problem; it's about preventing future headaches, ensuring your prints come out looking crisp and perfect, and extending the life of your precious equipment. A clean nozzle means smoother filament extrusion, fewer failed prints (saving you time and costly filament!), and ultimately, a much happier printing experience. Plus, there’s a genuine sense of accomplishment when you fix something yourself!
So, let's dive into some friendly, straightforward ways to get that nozzle spick and span. Remember, safety first! Always be careful when working with hot printer parts. Consider unplugging your printer when not actively heating, and always wear protective gloves if you’re concerned about burns.
The "Cold Pull" or "Atomic Pull" Method: Your First Line of Defense
This is probably the most popular and effective method for removing internal clogs. It's like flossing for your nozzle!

- Heat it Up: Load your usual filament (like PLA or PETG) and heat your nozzle to its typical printing temperature (e.g., 200°C for PLA, 240°C for PETG). Push some filament through to ensure it flows, showing that it’s fully melted.
- Cool Down (Just a Bit): Now, here’s the trick! Lower the temperature significantly. For PLA, drop it to around 90-100°C. For PETG, aim for 140-150°C. You want the filament inside to be soft, but not liquid.
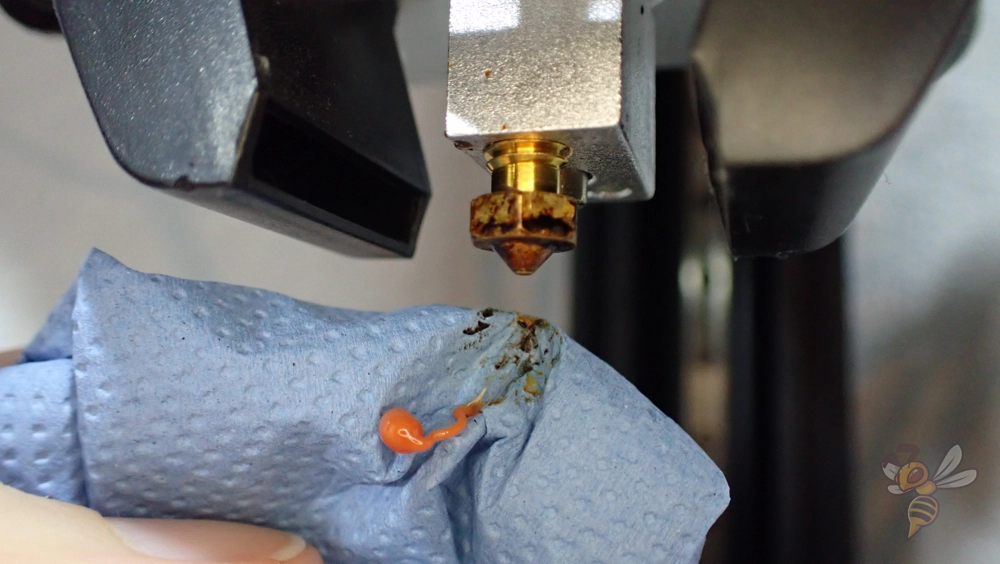
- Pull it Out: Once the temperature stabilizes in the lower range, give the filament a firm, steady pull upwards, straight out of the hotend. You should feel a slight resistance, and ideally, a "plug" of filament will come out, often with a dark, gunk-filled tip – that’s the clog!
- Repeat if Necessary: If the tip still looks dirty, repeat the process a few times until the pulled filament comes out clean.
The Needle & Brass Brush Combo: For External and Stubborn Clogs
Sometimes the clog is right at the tip, or there's burnt filament stuck to the outside.
- Heat it Up: Heat your nozzle back to printing temperature.
- Poke and Prod: Use the tiny needle that often comes with your printer (or a fine acupuncture needle) and carefully poke it up into the nozzle opening from below. This can dislodge anything blocking the very tip.
- Brush it Clean: With the nozzle still hot, take a brass wire brush (never steel, as it can damage the nozzle!) and gently scrub the outside of the nozzle to remove any melted plastic or debris clinging to it.
And there you have it! With these simple techniques, you’re now equipped to tackle most nozzle issues like a pro. A clean nozzle isn't just about functionality; it's about unlocking the full potential of your 3D printer, allowing you to create with confidence and joy. Happy printing, and may your extrusions always be smooth!