
Ah, summer. The sun is shining, the birds are singing, and you're sweating bullets in your car because your AC decided to take a permanent vacation. We've all been there, haven't we? That moment when you crank the dial to "arctic blast" and your car responds with a lukewarm sigh, like a tired old relative who's just not feeling it today. Your ice cream is melting faster than a snowman in July, your shirt is sticking to your back, and you're contemplating whether an open window at 70 mph is actually a viable long-term cooling solution.
Before you resign yourself to a future of sticky seats and perpetually damp armpits, or worse, start picturing dollar signs floating away to an auto shop, let's talk. What if I told you that fixing your car's AC might be about as complicated as making a really good grilled cheese sandwich? Seriously, for many common AC issues, all you need is a little refrigerant, a simple tool, and a can-do attitude. You don't need to be a certified mechanic, or even particularly handy. If you can open a soda can, you're practically overqualified.
Why Did My AC Go From Frosty to Fussy?
First off, don't panic. Your car's AC system isn't "using up" refrigerant like it does gasoline. Instead, it's a sealed system, but even the best seals can develop tiny, microscopic leaks over time. Think of it like a bicycle tire that slowly loses air – it's not broken, it just needs a top-up. The refrigerant (usually R-134a for most cars made after 1994) simply escapes over months or years, leading to that soul-crushing warm air. It's not a sign your car is falling apart; it's just a sign it's lived a little.
Alright, I'm In! What's My Shopping List?
Good choice! You're about to become your own climate control hero. Here’s what you’ll need:
- A Can of R-134a Refrigerant: Most auto parts stores have this. Often, they come with a built-in gauge and hose, which is what we want. Look for one that explicitly states R-134a.
- Safety Glasses: Seriously, wear these. Refrigerant is under pressure and can irritate your eyes. Better safe than sorry, right?
- Gloves: Optional, but good if you want to keep your hands clean and protect them from potential frostbite (it gets cold!).
That's it! No fancy wrenches, no obscure tools. Just a can and some common sense.

Let's Get Chilly: The Step-by-Step Breakdown
Step 1: Find the Low-Pressure Port (aka The AC's Belly Button)
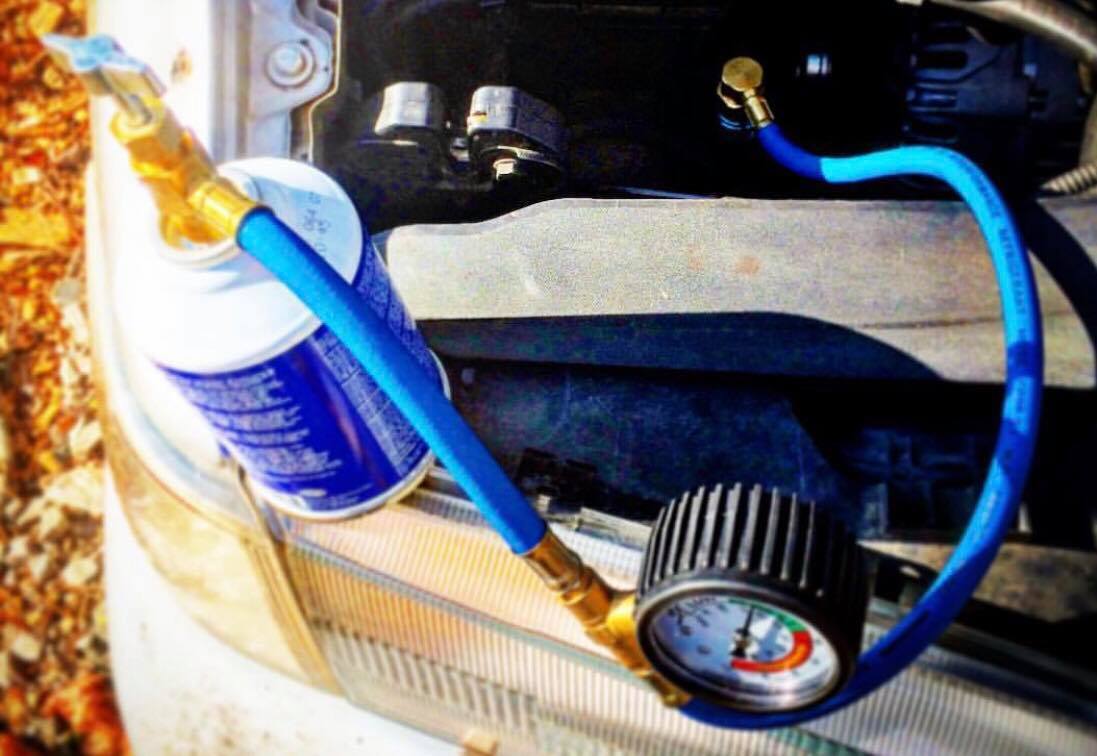
Pop your hood. Now, look for two service ports on your AC lines – one high-pressure (usually smaller, with an "H" cap) and one low-pressure (usually larger, with an "L" or blue cap). You absolutely, positively, only want to connect to the low-pressure port. Connecting to the high-pressure side could be dangerous. The low-pressure port is usually on the larger diameter aluminum tube. It looks like a tire valve, but bigger. If you're scratching your head, a quick Google search for "low-pressure AC port [your car make and model]" will usually point you right to it. It’s like finding Waldo, but in your engine bay!
Step 2: Attach the Hose (It's Easier Than You Think)
With your safety glasses on, grab your refrigerant can/hose assembly. Pull back the collar on the quick-connect fitting on the hose and firmly push it onto the low-pressure service port. You should hear a satisfying little click or feel it snap into place. Give it a gentle tug to make sure it's secure. It's like plugging in a garden hose, but for coolness!
Step 3: Fire Up the Car and Crank the AC
Start your car. Now, turn the AC to its coldest setting and the fan to high. This is crucial because it engages the AC compressor, which needs to be running for the system to draw in the new refrigerant. You should hear a distinct click or whir from the engine bay when the compressor kicks on – that's the sound of magic about to happen!
Step 4: Read the Gauge (Know Your Limits)
If your can has a gauge, you'll see a needle indicating the current pressure. Most gauges have color-coded zones: red (too low), yellow (getting there), and green (just right). Note where your needle is sitting. We're aiming for the green zone, but remember, don't overfill! More isn't always better, especially with AC refrigerant. Think of it like adding spices to a dish – too much can ruin it.

Step 5: Add the Refrigerant (A Little Sip, Not a Chug)
Hold the can upright and squeeze the trigger or push the button in short bursts of 5-10 seconds. Between bursts, gently rock the can back and forth to help the refrigerant flow. As you add refrigerant, keep an eye on the gauge. You'll see the needle start to rise. After each burst, wait a minute or two for the system to equalize, then check the gauge again and feel the air coming from your vents.
You'll probably notice the air getting progressively colder. Stop when the gauge needle is firmly in the green zone, and the air coming out of your vents feels wonderfully, gloriously cold. Resist the urge to keep going if it's already in the green and feeling good!
Step 6: Disconnect and Enjoy!
Once you're satisfied with the cold air and the gauge is in the green, release the trigger, pull back the collar on the quick-connect fitting, and remove the hose from the port. Replace the blue "L" cap securely. Pat yourself on the back, because you just saved yourself a good chunk of change and earned some serious DIY bragging rights!
When to Call a Pro (Because Even Superheroes Need Backup)
Most of the time, this simple top-up does the trick. However, if you add a whole can and the air is still warm, or if your AC compressor isn't kicking on at all, or if you hear a noticeable hissing sound (indicating a larger leak), it might be time to call in the cavalry – a professional mechanic. They have specialized equipment to diagnose larger leaks or other underlying issues. But for that common "it's just not quite as cold as it used to be" problem, you, my friend, are now fully equipped to tackle it.
So, go forth and be cool! Enjoy those perfectly chilled commutes, the non-sticky road trips, and the pure bliss of stepping into a refreshingly cold car. You've earned it.