
You know that feeling, right? That heart-stopping, stomach-dropping moment when you turn the key, and... nothing. Or maybe just a pathetic, groaning wheeze. It’s a scene most of us have played out at least once. My last encounter involved a seemingly perfectly fine morning, a quick stop for coffee, and then absolute silence when I tried to restart the car. I sat there, coffee going cold, mentally ticking off every possible culprit: starter? Alternator? Did I accidentally hit an EMP button? (Spoiler: no.)
After a good five minutes of silently cursing the universe and my car's questionable sense of humor, a friendly passerby leaned in. "Sounds like your battery, mate." My battery? But it was... fine? The lights worked, the radio played! This simple interaction, however, sparked a curious thought in my head: how do you actually know if your 12-volt battery is genuinely kaput, or just having a bad hair day?
And that, my dear reader, is how we find ourselves on this little quest. Because guessing about your battery is like trying to guess the ending of a M. Night Shyamalan movie – usually disappointing and rarely accurate. Let's dive into some actual, proper ways to test that crucial power brick sitting under your hood (or sometimes in your trunk, you never know!).
The Initial Sneak Peek: Visual Inspection (It's Free!)
Before you even grab a tool, just look at the thing. Seriously. Your battery can tell you a lot just by its appearance. Are the terminals covered in a fluffy, blue-green crusty mess? That's corrosion, and it can seriously mess with current flow. Give it a good clean with a wire brush and some baking soda paste (and wear gloves, please!).
Is the battery case swollen or bulging? Like it's eaten too many pies? That's a bad sign, usually indicating internal damage or overcharging, and it’s a pretty strong hint that it’s time for a replacement. Any cracks or leaks? Again, not good. If you see any of these, especially swelling or leaks, consider the battery a goner and proceed with caution. Safety first, folks!
![How to Check a 12V Battery with a Multimeter: Automotive Guide [2025]](https://multimeterworld.com/wp-content/uploads/2024/04/Untitled-design-2024-10-04T180142.733-1024x576.webp)
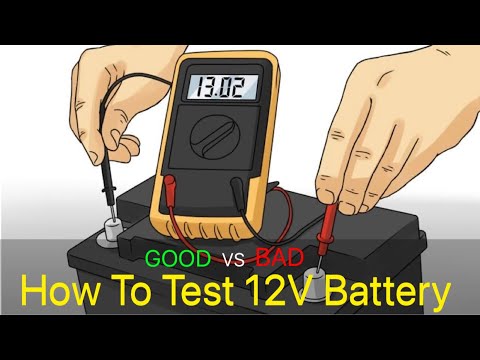
Getting Technical: The Voltage Test (Multimeter Magic!)
Okay, visual inspection passed? Great! Now let's get a little more scientific. For this, you'll need a
Here’s the deal:
- Set your multimeter to DC Volts (usually indicated by a 'V' with a straight line above it).
- Connect the red (positive) lead to the battery's positive terminal.
- Connect the black (negative) lead to the battery's negative terminal.
With the engine off and the car having sat for a bit (to let any surface charge dissipate), what's your reading?
- 12.6 volts or higher: Your battery is likely fully charged. Good news!
- 12.4 - 12.6 volts: Good charge, but maybe not 100%.
- 12.0 - 12.4 volts: It's partially discharged. Time for a charge.
- Below 12.0 volts: Houston, we have a problem. Your battery is significantly discharged, potentially damaged.

Now, here's a crucial point, and I want you to lean in for this: a simple voltage test only tells you the battery's surface charge. It doesn't tell you how well it can actually hold that charge under pressure. Think of it like someone looking perfectly fine but being terrible at lifting heavy things. We need to do a stress test.
The Grand Showdown: The Load Test (Where True Power is Revealed)
This is where the rubber meets the road, or rather, where the amps meet the battery. A load test simulates the conditions your battery faces when starting your car. This is the best way to truly assess its health. You can buy a dedicated battery load tester, or many auto parts stores will do this for free (which, let's be honest, is a pretty sweet deal).
A load tester works by drawing a significant amount of current from the battery for a short period (usually 10-15 seconds). A healthy battery will maintain a relatively stable voltage during this test. A weak battery, however, will see its voltage plummet like a stone in a well.
If you're doing it yourself (always follow the tester's instructions, obviously, and wear eye protection!):
- Connect the load tester to your battery.
- Apply the specified load for the recommended duration.
- Monitor the voltage. A 12-volt battery should ideally stay above 9.6 volts during the load test.
If the voltage drops below 9.6V (or whatever your specific tester/battery manufacturer recommends), especially if it drops quickly, your battery is likely on its way out. This is the most definitive test to tell you if your battery has enough "oomph" to start your car.

A Quick Nod to the Old School: The Hydrometer (If You're Feeling Retro)
For some older or serviceable batteries (the ones with caps you can remove), you might use a hydrometer. This little gadget measures the specific gravity of the electrolyte (the liquid inside the battery) in each cell. Different specific gravity readings indicate different states of charge for each cell. It’s pretty cool, but honestly, for most modern, sealed car batteries, it's not applicable, so don't sweat it if you can't use one.
So, What's the Verdict? (Decoding Your Battery's Secret Language)
After all that probing and prodding, you should have a pretty good idea of your battery's condition.
- Looks good, holds voltage, passes load test: Hooray! Your battery is healthy. The problem lies elsewhere.
- Looks bad, low voltage, fails load test: Time for a new one, my friend. Don't throw good money after bad.
- Looks good, low voltage, passes load test (after charging): It might just need a good charge. See if it holds that charge.
Remember, a little proactive testing can save you a whole lot of headache (and embarrassment) down the road. So next time your car gives you that ominous silence, you'll know exactly how to diagnose the heart of the problem. Happy testing, and may your battery always be full of juice!