Alright, buckaroos, gather 'round! Have you ever looked at a pellet stove, all shiny and new in its box, and thought, "How in the world do I get that warming up my living room?" Well, prepare to have your mind gently blown, because we're about to embark on a super fun, surprisingly easy adventure! Think of yourself as a super-savvy home hero, about to unleash a wave of cozy warmth.
Unleashing the Beast (of Warmth!)
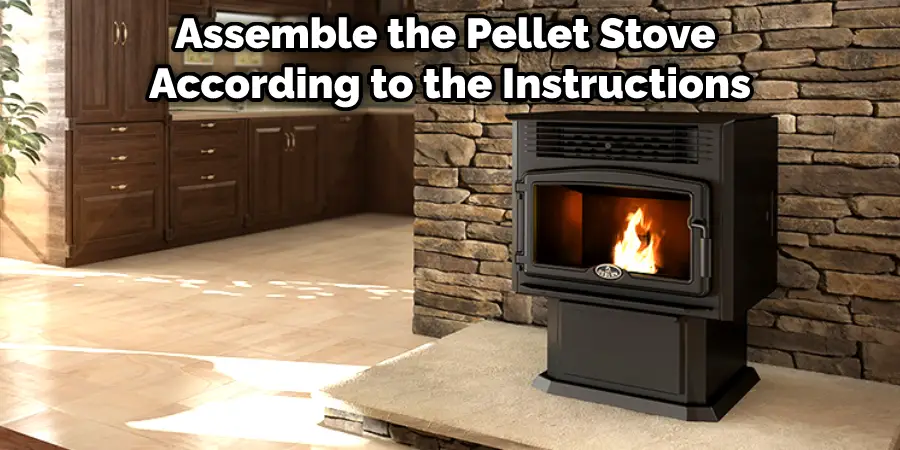
First things first, it's time for the grand reveal! Carefully unpack your shiny new pellet stove. Peel away all that protective wrapping like you're unwrapping the biggest, coziest present ever. Stand back and admire your future heat-provider; it’s quite a looker, isn’t it?
Now, let’s talk about finding its perfect kingdom. Pick a spot that feels just right, a place where its warm glow can hug the whole room. Imagine where your favorite armchair will go, ready for peak relaxation!
Remember, your stove is a star, and stars need a little elbow room to shine! Make sure there’s plenty of space around it, just like a dancer needs room to twirl.
Gathering Your Trusty Sidekicks (Tools!)
Every hero needs their tools, and you, my friend, are about to become a pellet stove superhero! Don’t worry, we’re not talking about anything too wild. Think of these as your trusty companions for this quest.
You'll want a sturdy drill, some snips for cutting, and maybe a measuring tape to make sure everything lines up just perfectly. A trusty caulk gun will be your sealing wizard! And don't forget some heavy-duty gloves – they're like your super-protective armor.
The Great Venting Adventure: Part One - The Indoor Journey
Connecting the First Pipe
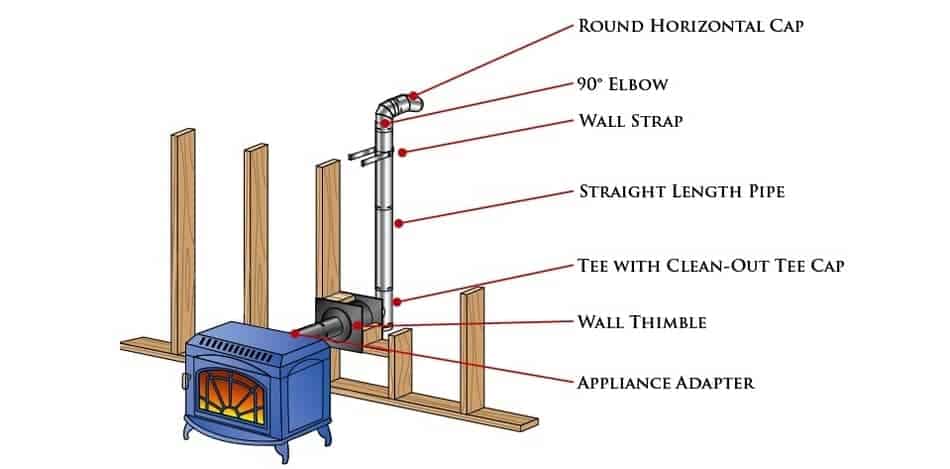
Here’s where the real fun begins! Your pellet stove needs to breathe, and that’s where the vent pipes come in. Grab that first, short section of pellet stove pipe – it’s often called the starter pipe or stove adapter.
This pipe has a special job: it connects directly to the stove’s exhaust port, which is usually found at the back. Gently twist or push it onto the port, making sure it slides on nice and snug. It should feel like a firm handshake!

Pro-tip: Some pipes will have a little gasket or a clamping mechanism. Make sure those are doing their job, creating a super tight seal!
Stacking Up the Warmth
Now, let’s build upwards (or sideways, we'll get there!). Each section of pipe is designed to fit into the next, usually with a crimped end that slides into a non-crimped end. Think of it like stacking giant, metal LEGOs!
Keep adding sections, pushing each one firmly into the last. You want them to be so snug, they could pass as one continuous pipe. This is your stove’s cozy chimney being born, right inside your home!
Elbow Room (Literally!)
If your venting path needs a little bend, that’s where the elbows come into play. These clever connectors allow your pipe to turn corners, like a secret agent making a discreet exit. Attach them just like you would a straight pipe, nice and tight.
Remember, every connection point needs to be sealed. Grab your high-temperature silicone sealant, the kind specifically designed for pellet stoves. This stuff is like super glue for heat! Squeeze a generous bead around each seam where two pipes meet.

This sealant isn't just sticky; it's a heat-proof superhero, making sure all the cozy warmth stays in the pipes and doesn't sneak out!
The Great Venting Adventure: Part Two - Breaking Free!
Through the Wall or Up Through the Ceiling?
Your stove’s breath needs to get outside, so now we choose its grand escape route! Are we going straight up through the ceiling and roof, or will we punch through an exterior wall? Both are totally doable and equally heroic.
If you’re going through a wall, you'll need a special gadget called a wall thimble. This is like a protective tunnel that lets your hot pipe pass safely through the wall material. It’s super important and keeps everything safe and sound.
For ceiling explorers, a ceiling support box or firestop spacer is your best friend. This magical box supports the pipe as it climbs higher and protects your ceiling from all that lovely warmth. Position it carefully!
Cutting the Great Escape Hatch
Now for the exciting part: making the opening! Whether it’s a hole in your wall or ceiling, measure twice, cut once! Use your drill to start a pilot hole, then your jigsaw or reciprocating saw to create a perfectly sized opening for your thimble or support box.
Once the opening is clear, install your wall thimble or ceiling support box according to its instructions. It will have flanges or trim pieces that secure it in place, making it look neat and tidy. This is your stove's official portal to the outside world!
The Outdoor Climb
Continue adding your pellet stove pipes, pushing them through the thimble or up through the support box. Keep that sealant handy for every single connection! You’re building a mighty column for your stove’s exhaust.
If you’re venting vertically, your pipes will ascend to the heavens! If horizontally, they’ll poke out just a bit from your wall. Make sure the exterior pipe extends far enough to be safe and effective.
Capping Off the Masterpiece
Almost there! The very last piece of your venting puzzle is the vent cap. This is like the jaunty hat on top of your stove’s chimney, keeping out rain, snow, and any curious critter who might try to sneak a peek.
Attach the vent cap firmly to the last section of pipe. Again, use that trusty high-temperature sealant around the base of the cap for a truly impenetrable seal. You’ve done it! Your stove now has a voice, a way to breathe!
The Grand Finale: Power Up and Pellet Party!
Plug It In, Baby!
Now for the electric magic! Locate the power cord on your pellet stove. Find a dedicated electrical outlet nearby that’s ready to provide the juice. Gently but firmly plug in your stove. You might hear a little whir or a click – that’s just your stove saying, “Hello, world!”
No extension cords allowed for this kind of power-packed appliance! Your stove needs its own dedicated energy highway.
Fueling Your Fire Friend
It’s time to feed your new beast! Open up the hopper lid – that's the big compartment where the pellets go. Pour in your wood pellets, watching them tumble down like delicious little energy nuggets. Fill it up generously; your stove loves a full belly!
The Moment of Truth: Ignition!
Take a deep breath. You’ve journeyed through pipes, sealant, and power cords. Now, it’s time for the ultimate payoff! Locate the power button or the start sequence on your stove's control panel. Push it!
Listen for the hum of the fan, the whir of the auger feeding pellets, and then, after a few exciting minutes, watch for the tiny flame to ignite. You just brought a warm, cozy friend to life!
Congratulations, you magnificent heat-wrangler! You’ve not only hooked up a pellet stove, but you’ve also created a beacon of warmth and comfort in your home. Now, grab a mug of your favorite warm beverage, settle into that armchair, and bask in your glorious, self-installed warmth. You earned it!